Developing a compact powder case with a metal exterior means understanding both the outer shell and the parts inside. The aluminum shell, plastic components, and aluminum powder pan serve different purposes. How they fit together determines how the case is assembled; how the shell is formed and decorated determines the appearance a design can achieve.
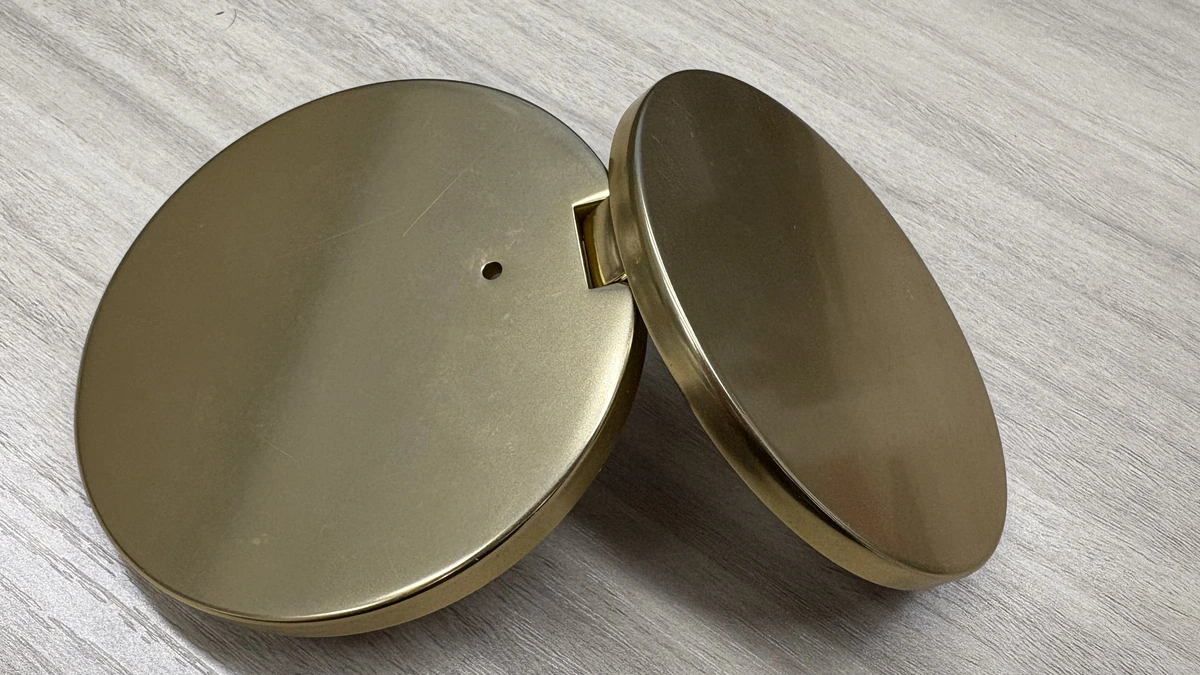
The following example uses this round hinged compact powder case from Wbmetal, starting with the parts visible when it is open.
What the aluminum shell, plastic components, and powder pan do
A compact powder case holds powdered cosmetics pressed into a cake. A metal-shell version uses metal lid and base shells around the outside, with internal structures and powder-holding components inside.
In this case, the lid and base shells are stamped aluminum, while the internal structural parts are plastic. The aluminum forms the visible exterior and sidewalls, where color, gloss, and brand markings can be applied. The plastic components form the powder-pan recess in the base and the structure around the mirror in the lid, defining the internal space and component positions.
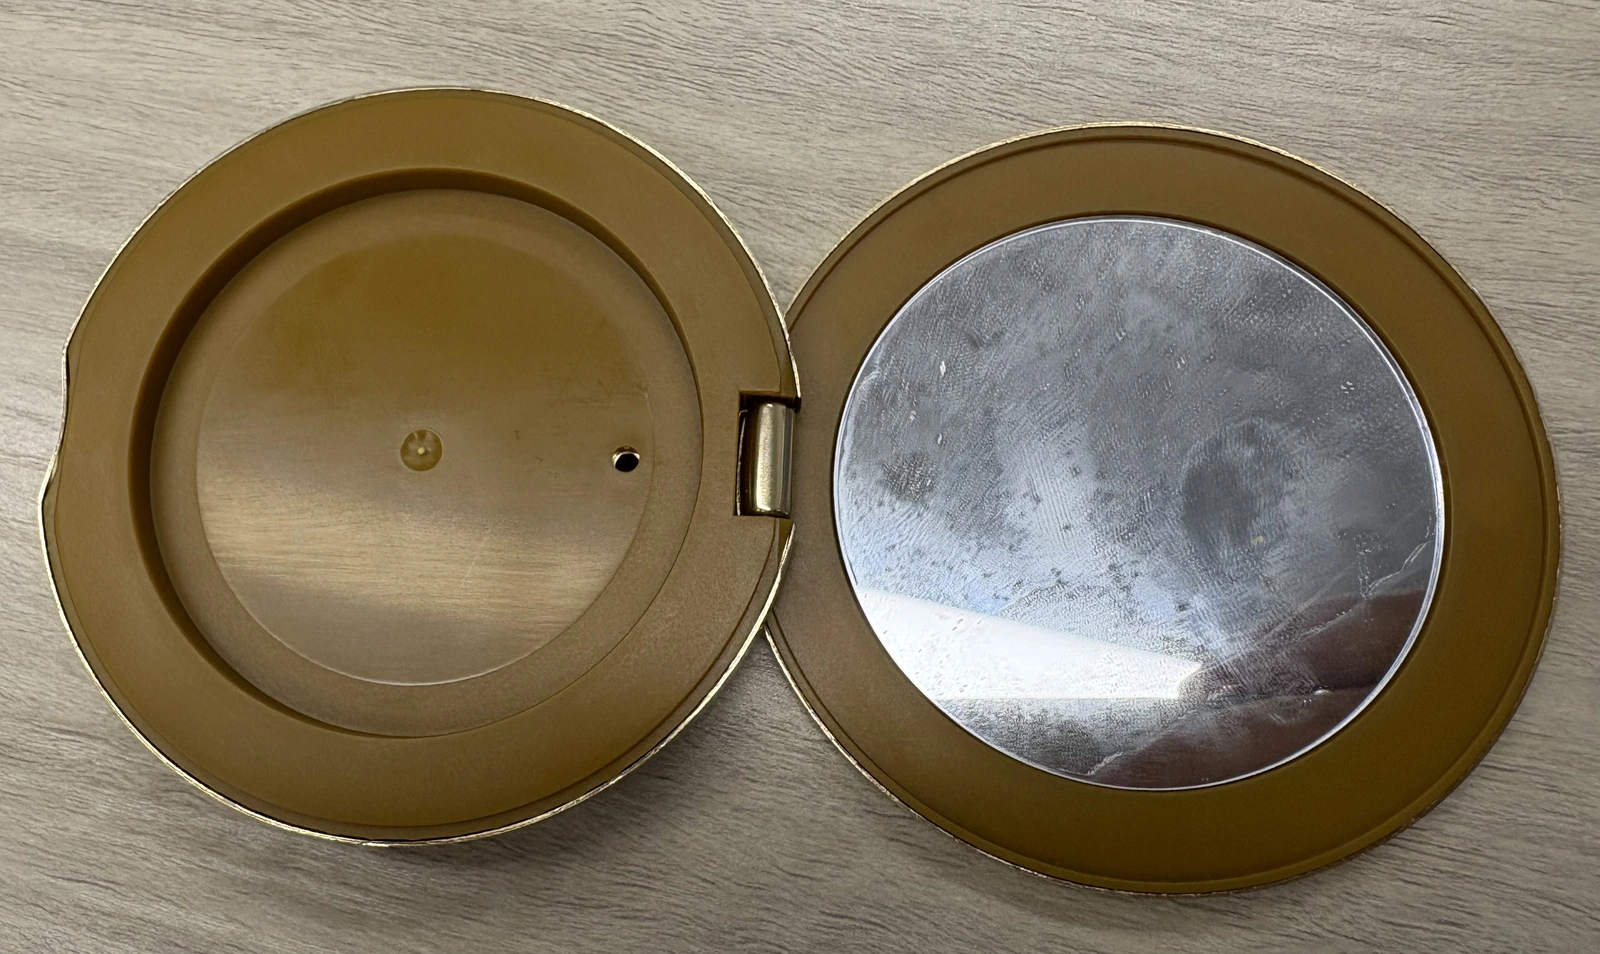
For filling, a thin aluminum pan is placed in the plastic recess to hold the powder directly. This pan and the outer aluminum base shell are separate parts: the pan contacts the powder, while the base shell surrounds the case externally. The photographed plastic recess has no pan installed. The diagram below shows the relative positions of the pan, insert, and base shell.
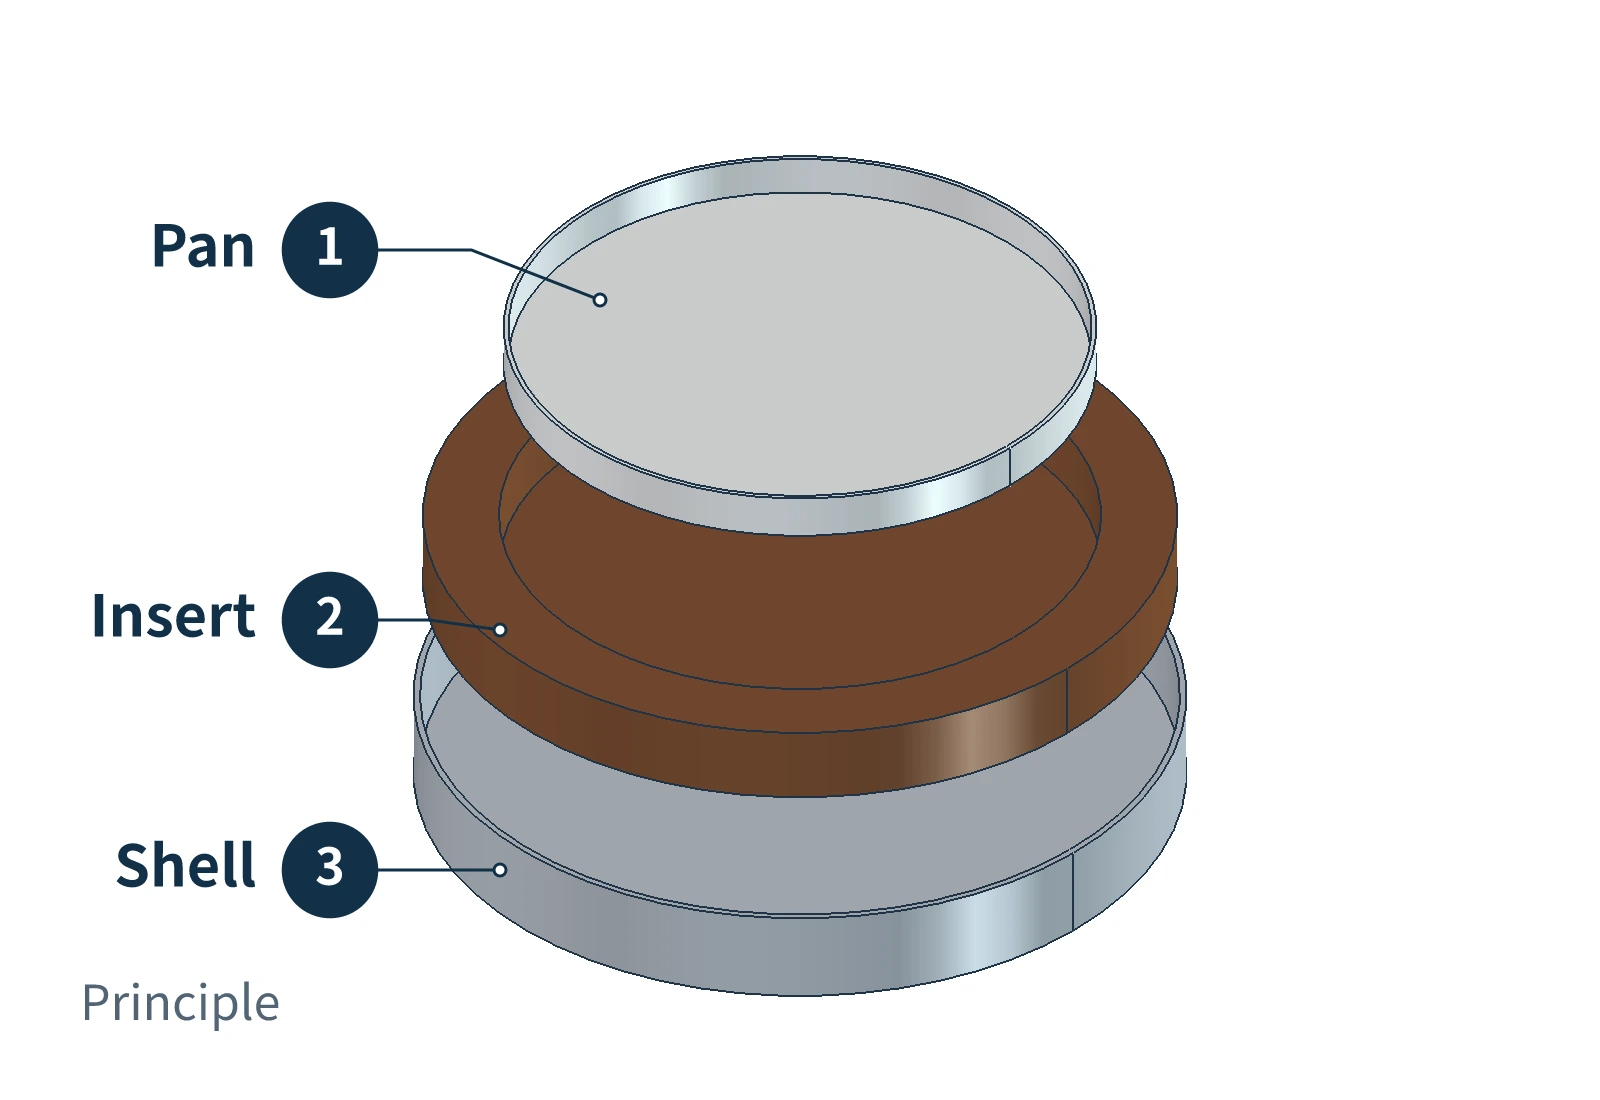
This division of functions allows aluminum sheet to form a continuous outer shell while the plastic parts provide the internal shapes. The separate powder pan holds the cosmetic powder.
How the aluminum shell is bonded to the plastic insert
This case uses adhesive bonding. A spot of glue is applied at the center of the aluminum base shell’s inner bottom surface. The plastic insert is then pressed into the shell so that its outer bottom surface contacts the glue spot. Once the insert is in place, the adhesive layer joins the two surfaces and holds the insert and base shell together.
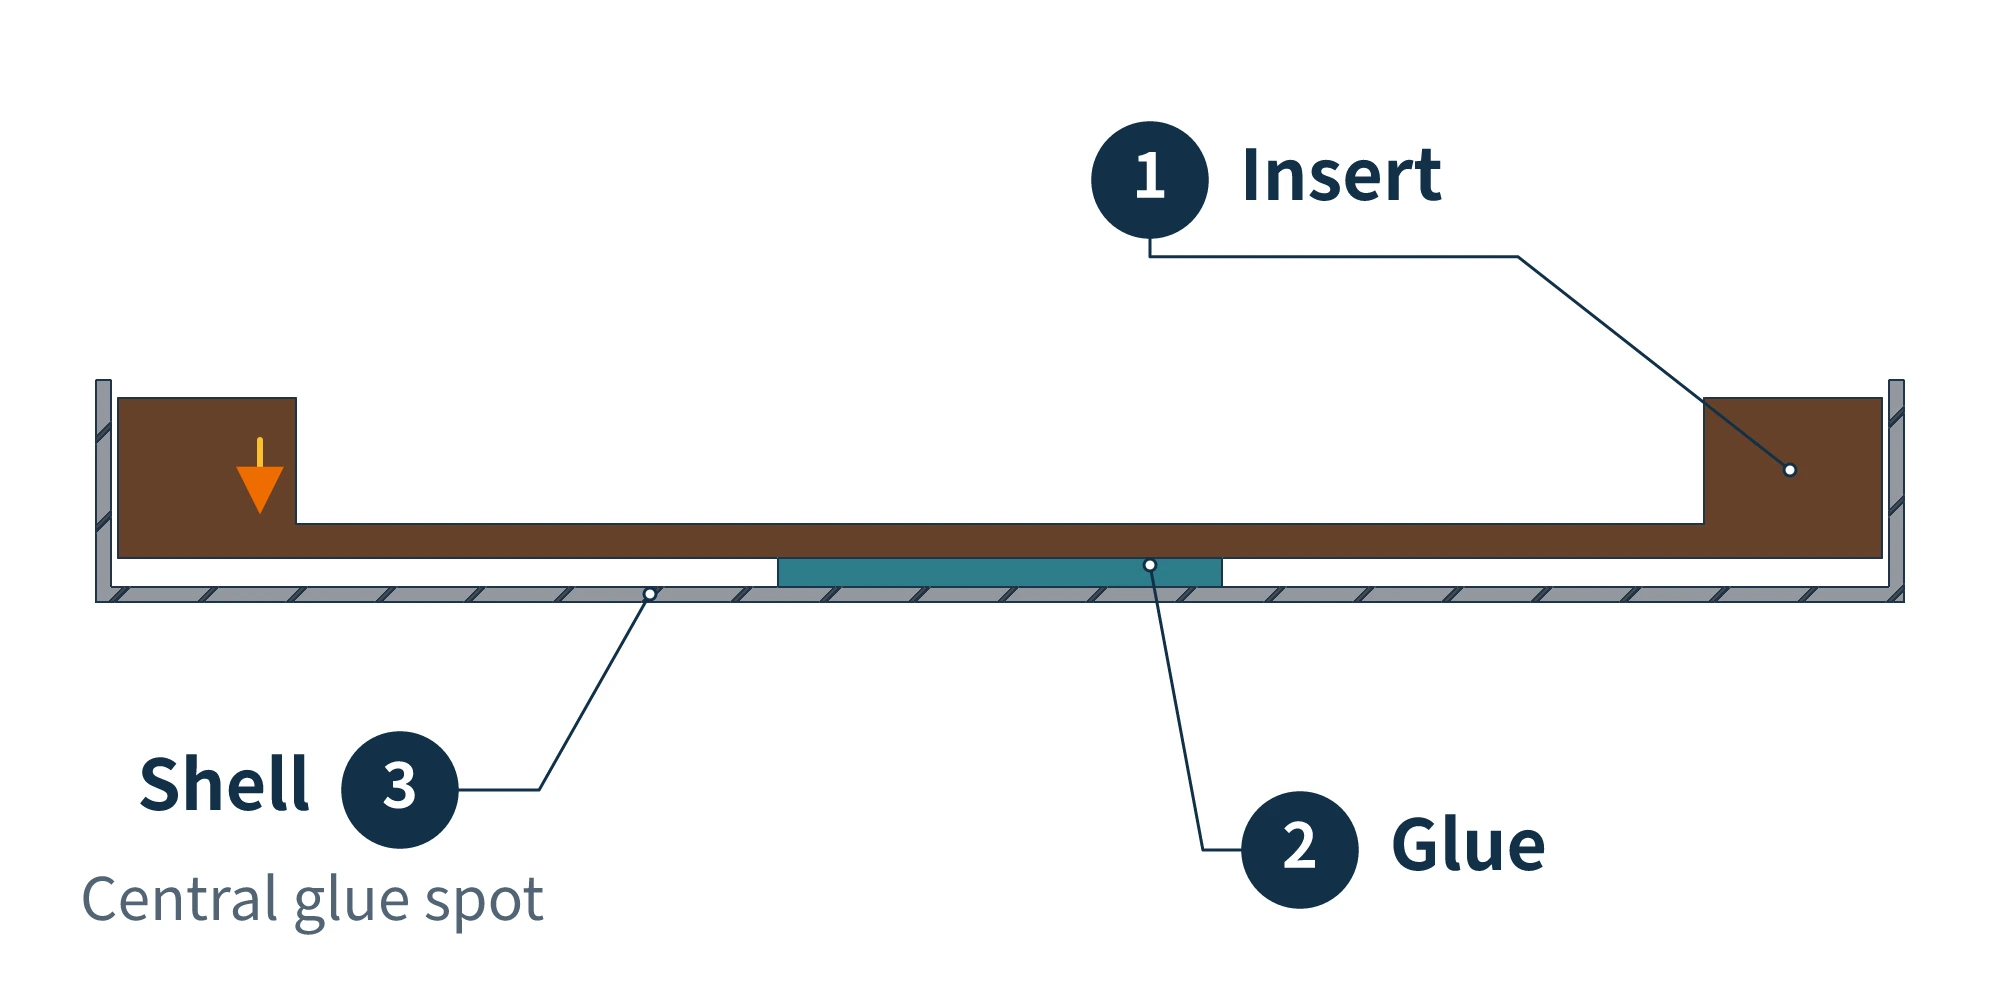
The adhesive bonds to the surfaces it actually contacts. If the aluminum already has a coating, the bond is to that coating, whose own adhesion also affects the joint. The adhesive must suit the plastic resin and the condition of the aluminum surface, and the mating surfaces need to be clean. The bond gap and curing conditions must also meet the adhesive’s requirements.
How aluminum sheet is stamped into a compact shell
The aluminum shell of this case is made by stamping. The shallow-cup deep drawing demonstration below explains how a shell with sidewalls can be formed. A flat blank is first cut from an aluminum sheet. A punch then draws the sheet into a die cavity, while material around the outside feeds inward to form the sidewalls. Deep drawing is the forming action that turns the sheet into a shell.
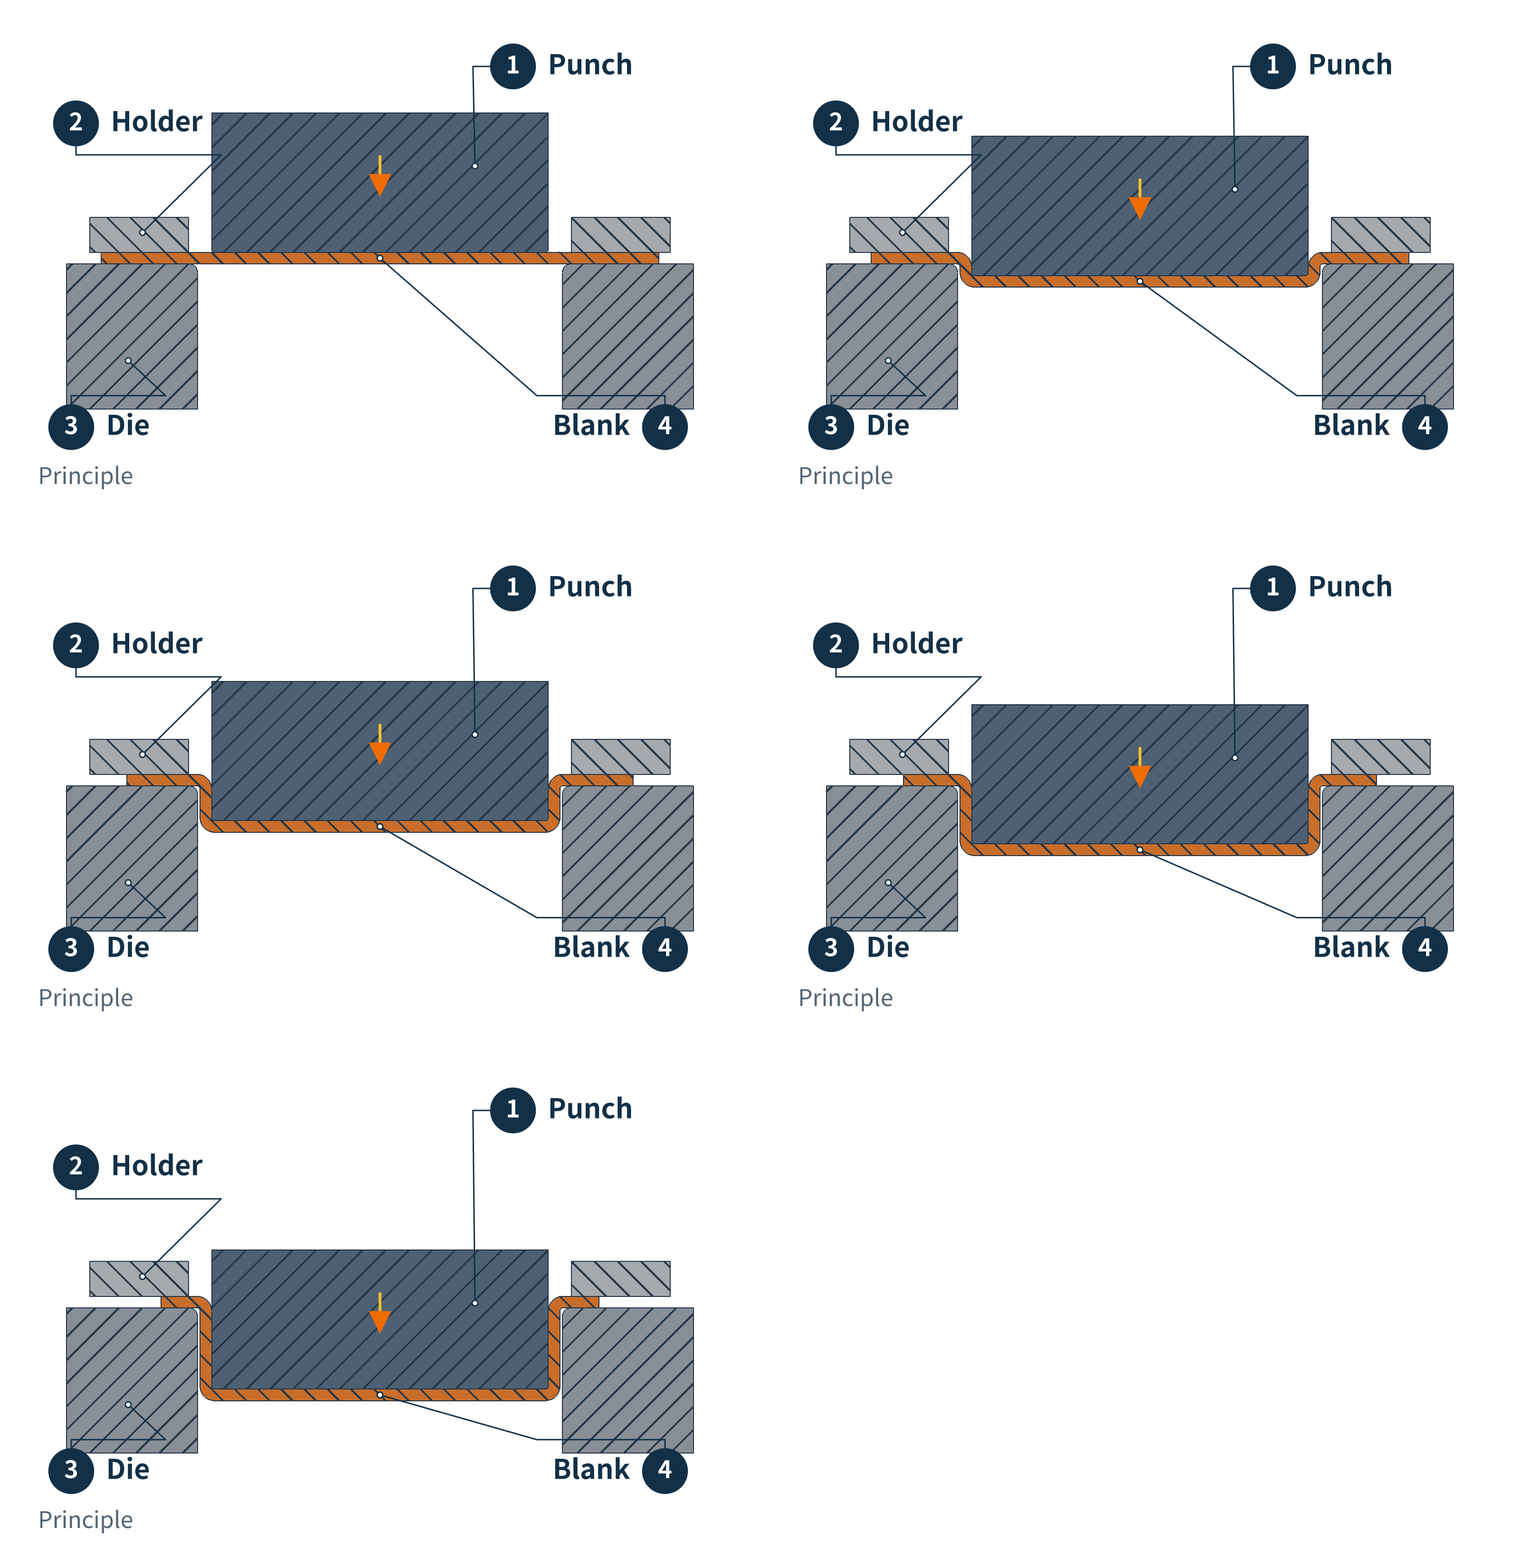
The blank holder controls the flow of the surrounding sheet to reduce wrinkling while still allowing material to enter the die. Insufficient holding pressure makes the surrounding sheet prone to wrinkles. Excessive pressure restricts feeding and can cause local thinning or tearing. The radii and lubrication also affect how smoothly the sheet flows.
After forming, the shell opening is trimmed and burrs are removed as needed, preparing the shell for decoration and assembly. The number of operations required depends on the shell geometry, the condition of the aluminum, and the tooling arrangement.
How powder coating, electroplating, screen printing, and laser engraving change the appearance
Once the shell shape has been formed, the overall surface and localized markings can be treated separately. The two design comparisons below keep the same round lid shape and viewing angle to show which parts of the appearance the four processes change.
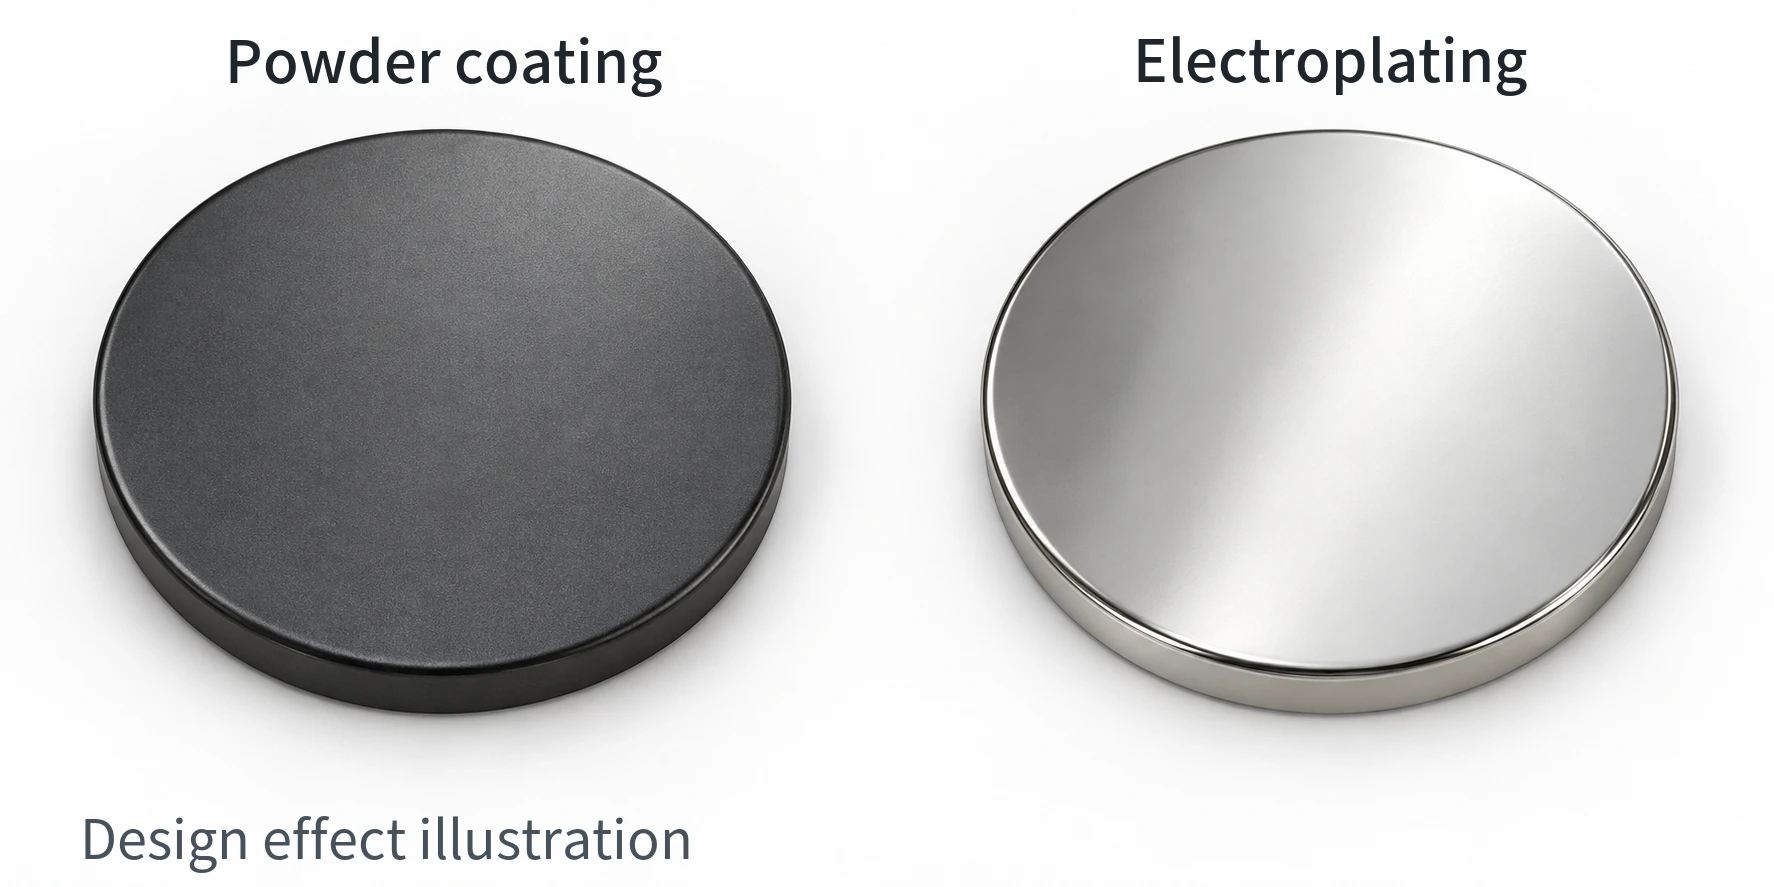
Powder coating: Creating a colored coating
Powder coating uses electrostatic attraction to deposit powder coating material on a prepared aluminum shell, then cures it into a continuous coating. The color, gloss, and texture depend on the powder system and curing conditions. These can produce a colored matte finish like the one illustrated.
The aluminum surface needs degreasing and suitable pretreatment so the coating adheres. The design illustration compares appearance; curing parameters must follow the technical specification of the actual powder used. For example, AkzoNobel’s technical data for one polyester powder recommends a workpiece temperature of 200 °C for 10-15 minutes to achieve a matte finish. Shells requiring this type of curing should be coated before temperature-sensitive plastic parts are fitted.
Electroplating: Depositing a metallic layer on aluminum
Electroplating deposits a metallic layer on a prepared aluminum surface and can create a bright silver reflective appearance like the one illustrated. Aluminum readily forms an oxide film that interferes with the bond between the plating and substrate. It therefore needs suitable pretreatment, such as oxide removal, zincating, and a compatible underplating layer, before subsequent metal layers are deposited.
The illustrated bright silver finish is an appearance target. The actual color and gloss depend on both the plating system and the preparation of the underlying surface.
Screen printing: Adding an ink pattern to the surface
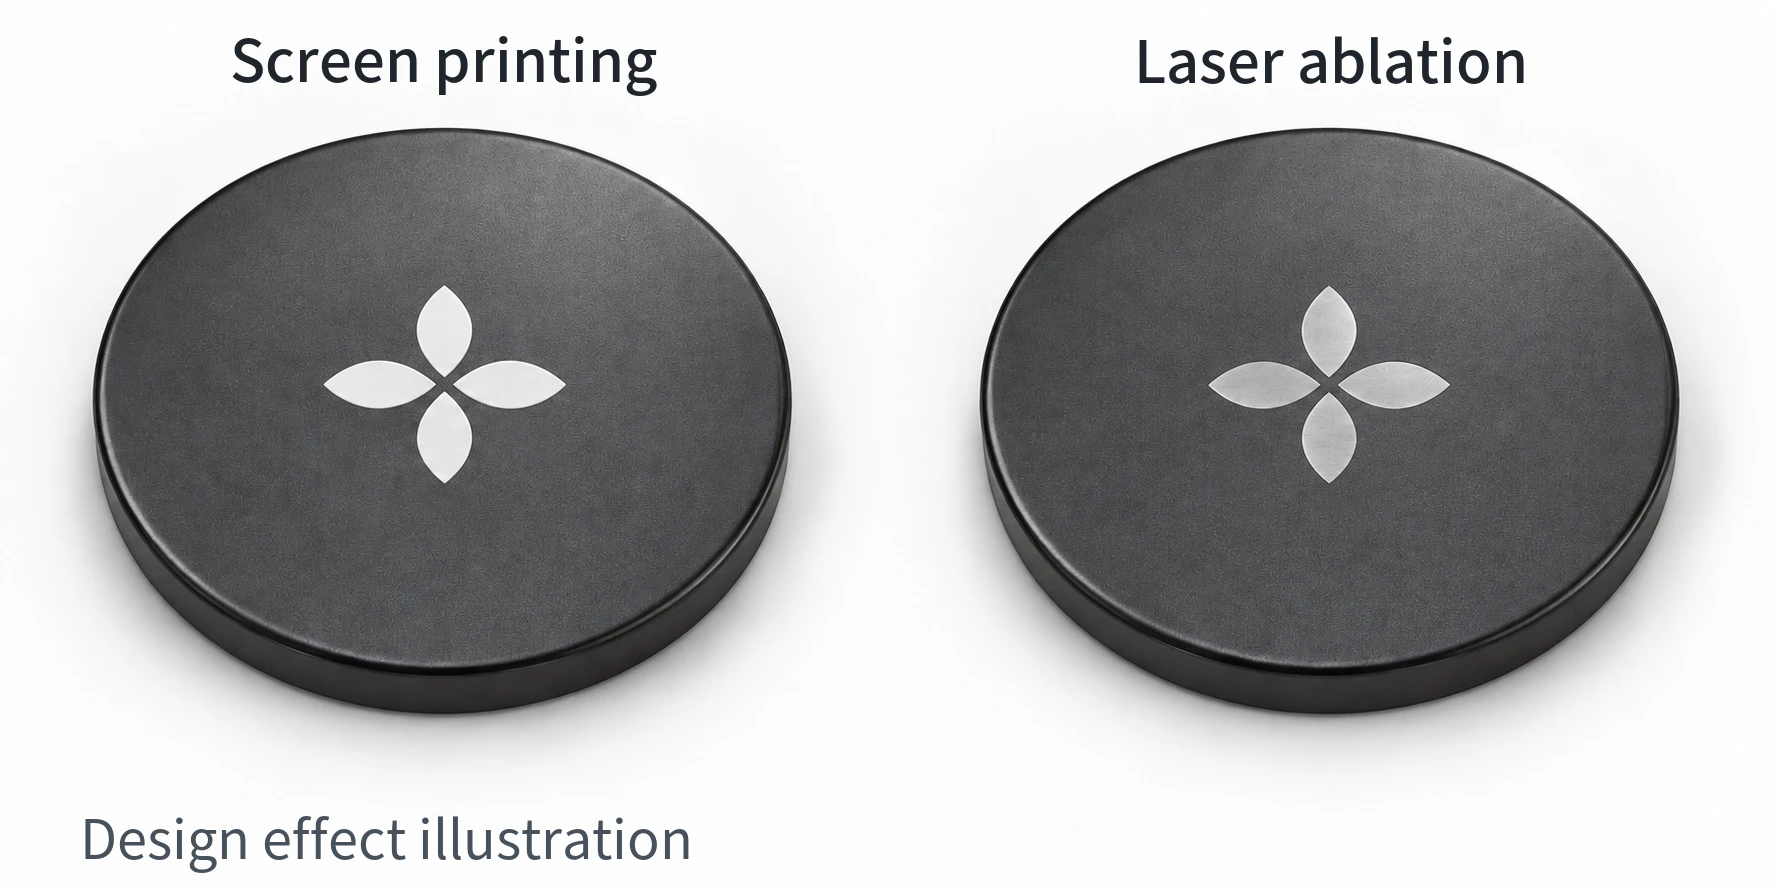
Screen printing uses a squeegee to push ink through the open image areas of a mesh stencil, leaving text or a pattern on the shell. The white mark in the illustration adds a patterned layer of ink over the dark surface.
The ink must suit the actual aluminum surface or coating and be dried or cured as specified. Different underlying surfaces can give different adhesion results even with the same printed design, so the print needs to be checked on the relevant surface.
Laser engraving: Producing localized markings
The process referred to here as laser engraving uses a laser to produce a mark. The illustration shows local removal of the dark coating, using the contrast between the coating and the underlying material to reveal the design. A laser can also remove substrate material to create an engraved recess. Different working layers and processing methods produce different colors, depths, and surface feel.
For a brand mark, the shell’s surface system should therefore be defined first. Then the mark can be made by adding an ink pattern or by using a laser to process the existing surface. Together with the shell’s overall color and gloss, these choices create the final visible design.