A leather wrap brings metal shine and leather texture together on a perfume cap. Along with color and pattern, the design needs to account for where the wrap sits, how it attaches to the body, and how its ends meet. These details help determine whether the finished design looks complete and its edges sit evenly.
Understanding what the metal body and the wrap each do makes it easier to connect an appearance concept with the way the parts fit together.
What the Metal Body and the Wrap Each Do
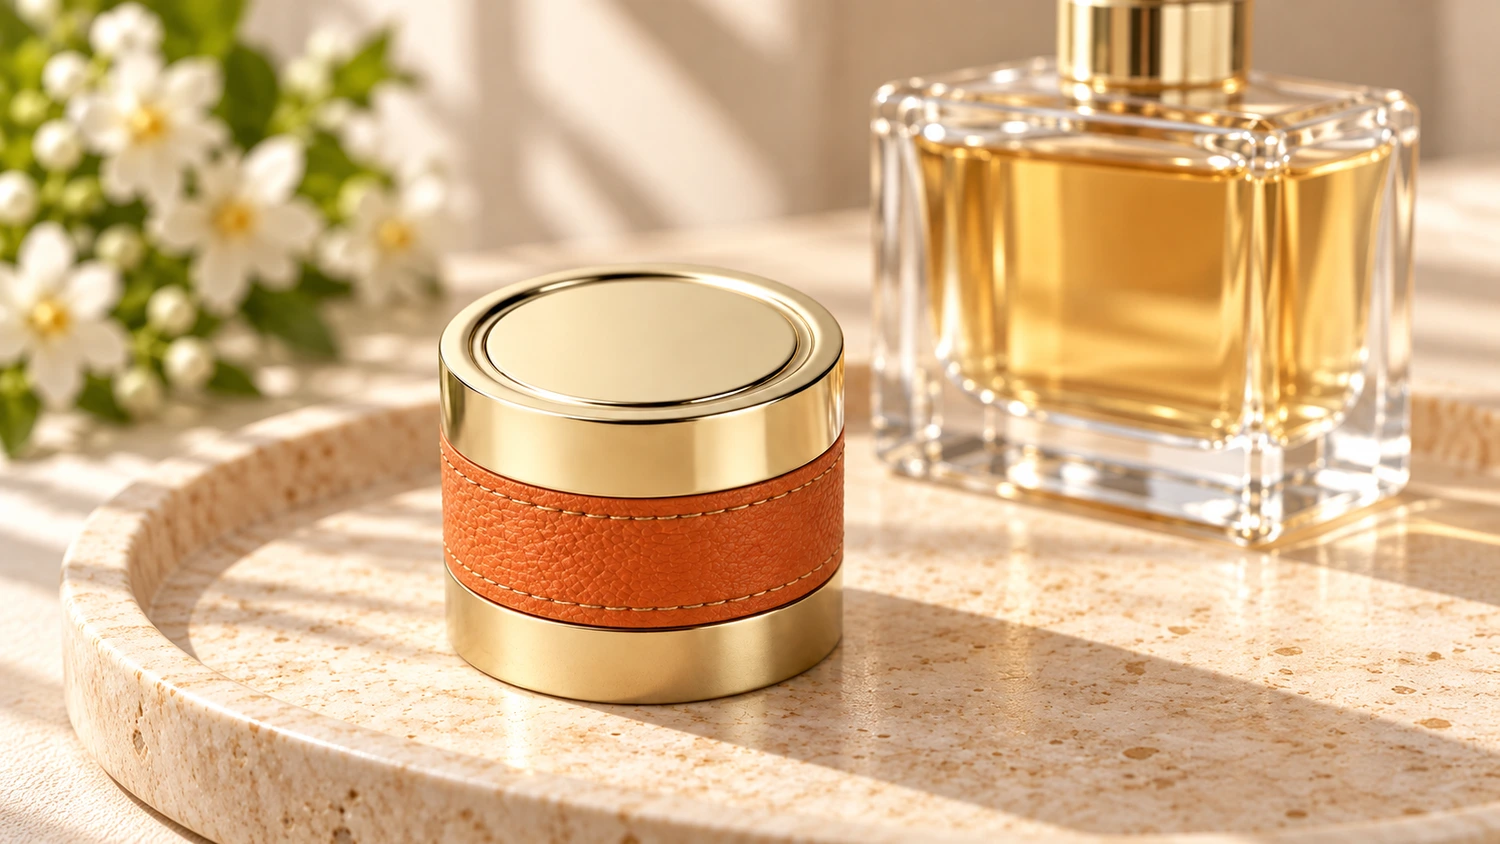
A leather-wrapped perfume cap has an outer covering over a metal body. The metal defines the cap’s shape, while the wrap provides color, leather texture, and the surface your fingers touch. The wrap can cover only part of the sidewall, leaving the metal top and the bands above and below it exposed.
Wbmetal’s custom perfume cap showcase includes a design that combines gold-tone metal with an orange leather-textured band. The wrap sits in the middle, with exposed metal above and below and two rows of stitching on the band. In this type of design, the cap’s shape and the area covered by the wrap need to be considered together. It involves more than a change in surface color.
Depending on the design, the metal part can be die-cast, then trimmed, further processed, and surface-finished. The wrapping material is cut and prepared separately before it is combined with the cap body. Each material goes through the processing suited to it before the two form the finished design.
Leather Texture, Real Leather, and Synthetic Leather
The term “leather wrap” describes an appearance concept; the actual material still needs to be identified. The Leather Working Group’s definition of leather is based on the retained fiber structure of animal hide. Leather can also have a surface finish that obscures its natural grain.
Synthetic leather can use a fabric backing with a leather-like surface. A polyurethane (PU) coating, for example, can be applied to a fabric backing or to split leather. Split leather comes from the inner layers produced when animal hide is split horizontally, and it retains an animal-hide fiber structure. A PU label therefore doesn’t necessarily mean the backing is fabric, and a leather-like texture doesn’t establish that the material is real leather.
The visible face and the back of the wrap also serve different purposes. The face determines the visible pattern, while the back contacts the adhesive. Before considering how the wrap bonds to metal, identify its base material, surface finish, and backing condition.
How the Wrap Bonds to the Metal Surface
Adhesive bonding is one possible way to join the materials. An adhesive layer sits between the back of the wrap and the metal surface. One side bonds to the wrap and the other to the cap body, joining them across the contact area. Liquid adhesives and adhesive films can both be used for suitable material combinations. The choice depends on the wrap’s backing, the actual finish on the metal, and the intended use.
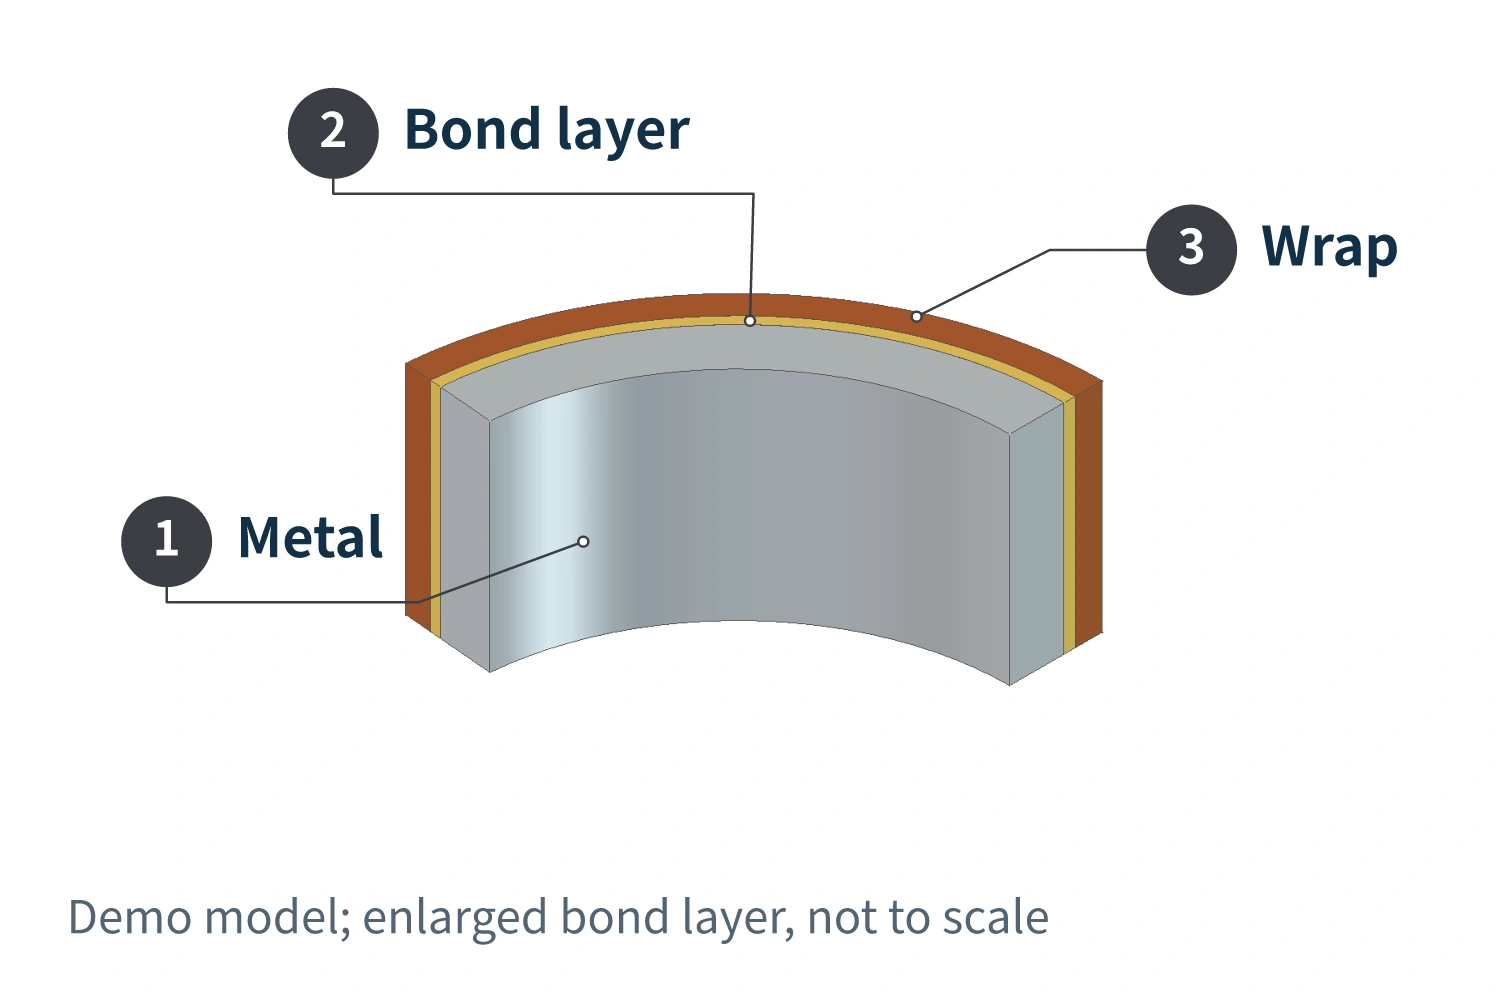
The metal may already have a plated or coated finish. That finish is the surface the adhesive actually contacts. Knowing only that the body is zinc alloy or aluminum alloy is not enough to determine the adhesive. The same applies to the wrap’s backing: coatings, fibers, and surface condition all affect bonding.
A contact adhesive applied to both surfaces provides one example of how the bonding process works:
- Clean the contact surfaces. Remove dust, oil, wax, and loose surface material so the adhesive contacts a stable surface. The cleaning method must suit the actual materials and finishes. Sanding or wiping with the same solvent is not appropriate for every surface.
- Apply an even coat and allow the specified drying time. With this type of contact adhesive, coat both surfaces evenly, then allow solvent to evaporate until the adhesive is ready for joining. Leather and similar materials often allow little solvent to pass through. This evaporation therefore needs to take place before the two surfaces are brought together. Follow the adhesive’s instructions for drying time and how to judge when the surfaces are ready to join.
- Align the wrap, then press it into place. Fit the wrap around the body without trapping air, then apply even pressure, paying particular attention to the edges. Pressure helps the two surfaces make full contact. Simply wrapping the material around the cap doesn’t mean it has bonded securely.
- Allow the required time after pressing. Being able to handle or further process a newly bonded part doesn’t mean the bond has reached its final strength. After pressing, allow time for bond strength to develop. Follow the adhesive’s technical instructions for the required waiting time and conditions.
Technical information from 3M and Bostik describes coating both surfaces, allowing a drying period, and applying pressure when joining them. Other adhesive systems can require a different sequence. This is a general explanation, not confirmation of the adhesive or concealed fastening used in the design shown on Wbmetal’s website.
The adhesive can also affect appearance. If it penetrates thin, colored leather, it may leave stains or discoloration on the visible face. Check compatibility with the actual wrapping material rather than checking only whether the adhesive holds.
How Seams, Edges, and Stitching Work
When a flat strip wraps around a cylindrical sidewall, its two ends have to meet. A butt joint places the ends edge to edge. The cut length and positioning must work together, or a gap or an uneven bulge can form. A lap joint places one end over the other. The overlap adds another layer of material, making it thicker than the surrounding area.
To reduce the step at an overlap, the ends can be thinned locally. This process, called skiving, removes part of the material. A tapered cut can also make the thickness change gradually toward the end. Leather-processing equipment manuals describe both uniform and tapered skiving for leather and suitable polyurethane materials.
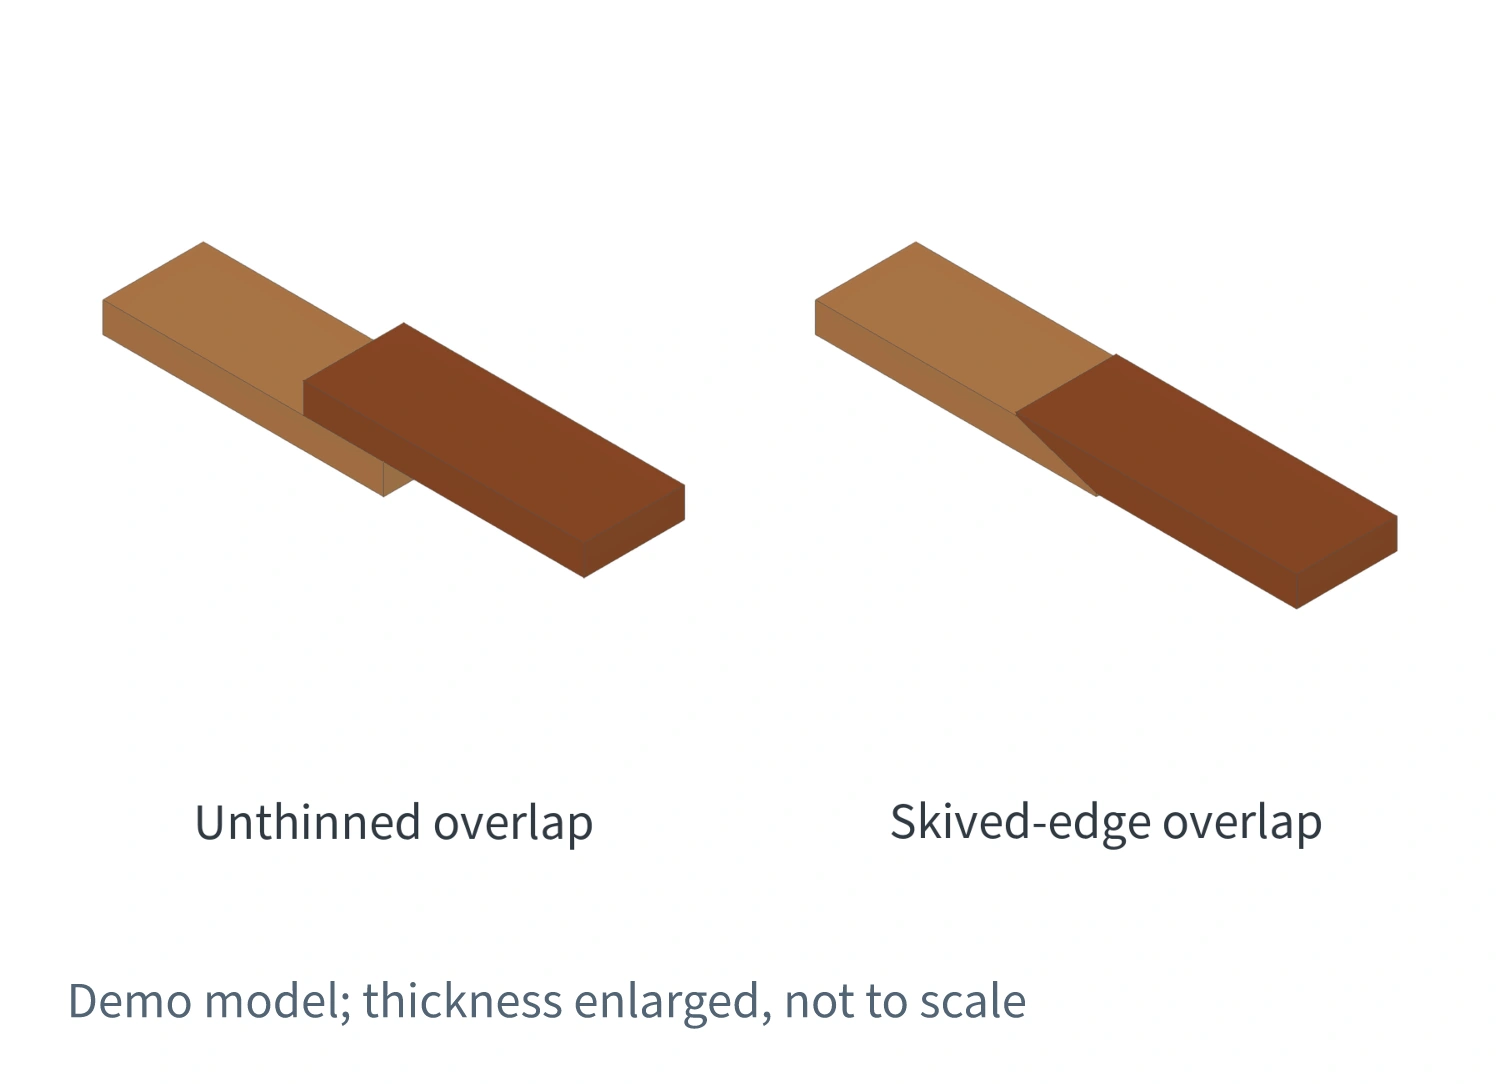
The illustration shows how the layers stack. Overlapping two pieces at their full thickness increases the local thickness; removing some material from the ends reduces the raised area. Whether skiving is needed, and where to apply it, depends on the material and seam design. No single skiving method is a fixed step for every wrap.
The cut dimensions, the way the ends join, and the edge treatment should be decided before wrapping. If excess thickness at the seam is discovered after bonding, pressing it flat alone is unlikely to remove the extra thickness.
For stitching, the question is what the thread passes through. Thread can pass through holes in leather pieces to join those pieces or related layers. That is a different connection from an adhesive layer bonding the wrap’s backing to metal. The two rows of stitching in the website design show an appearance detail. They don’t establish that the thread passes through the metal cap body.
Which Details Shape the Finished Appearance?
Even with the same band-style wrap, its width, color, and grain change the appearance of the middle section. The exposed metal top and edge bands provide a different sheen. Stitch color and placement also change the visual boundary of the wrapped area.
When inspecting the finished cap, follow these boundaries. Look for wrinkles or bulges, lifting edges, raised or open seams, adhesive marks, and discoloration. These can point to different issues with contact, thickness transitions, or material compatibility. An even appearance doesn’t replace checks under prolonged use or after contact with perfume.