What Is a Zinc Alloy Crystal Perfume Cap?
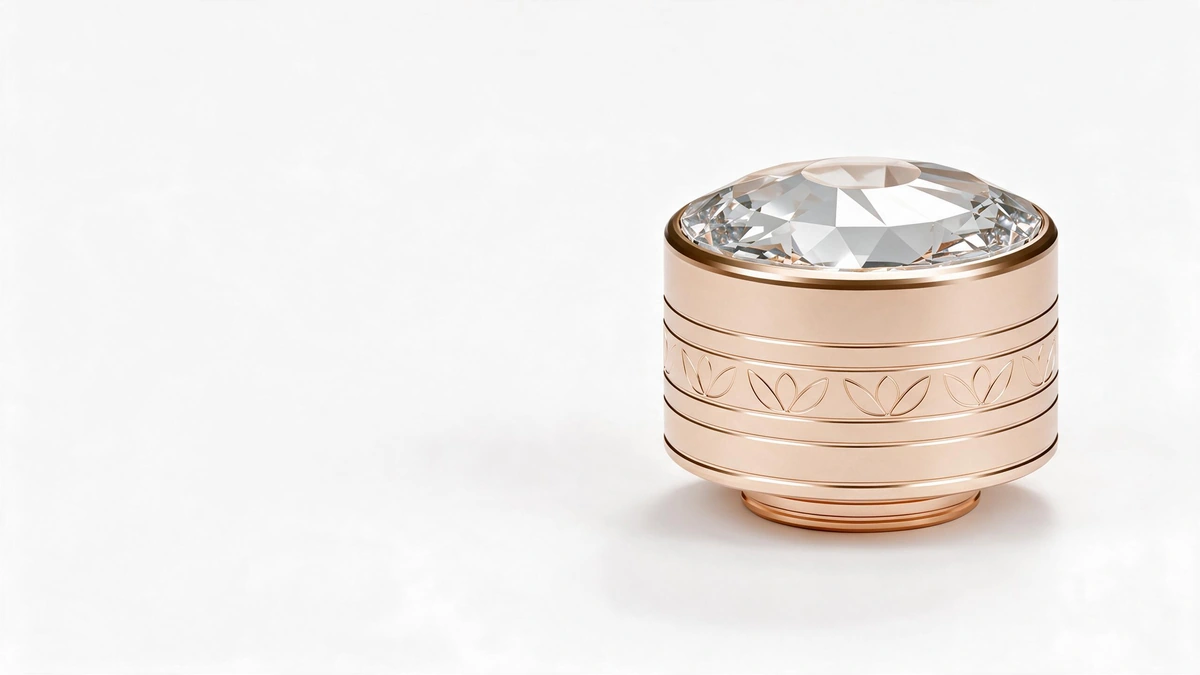
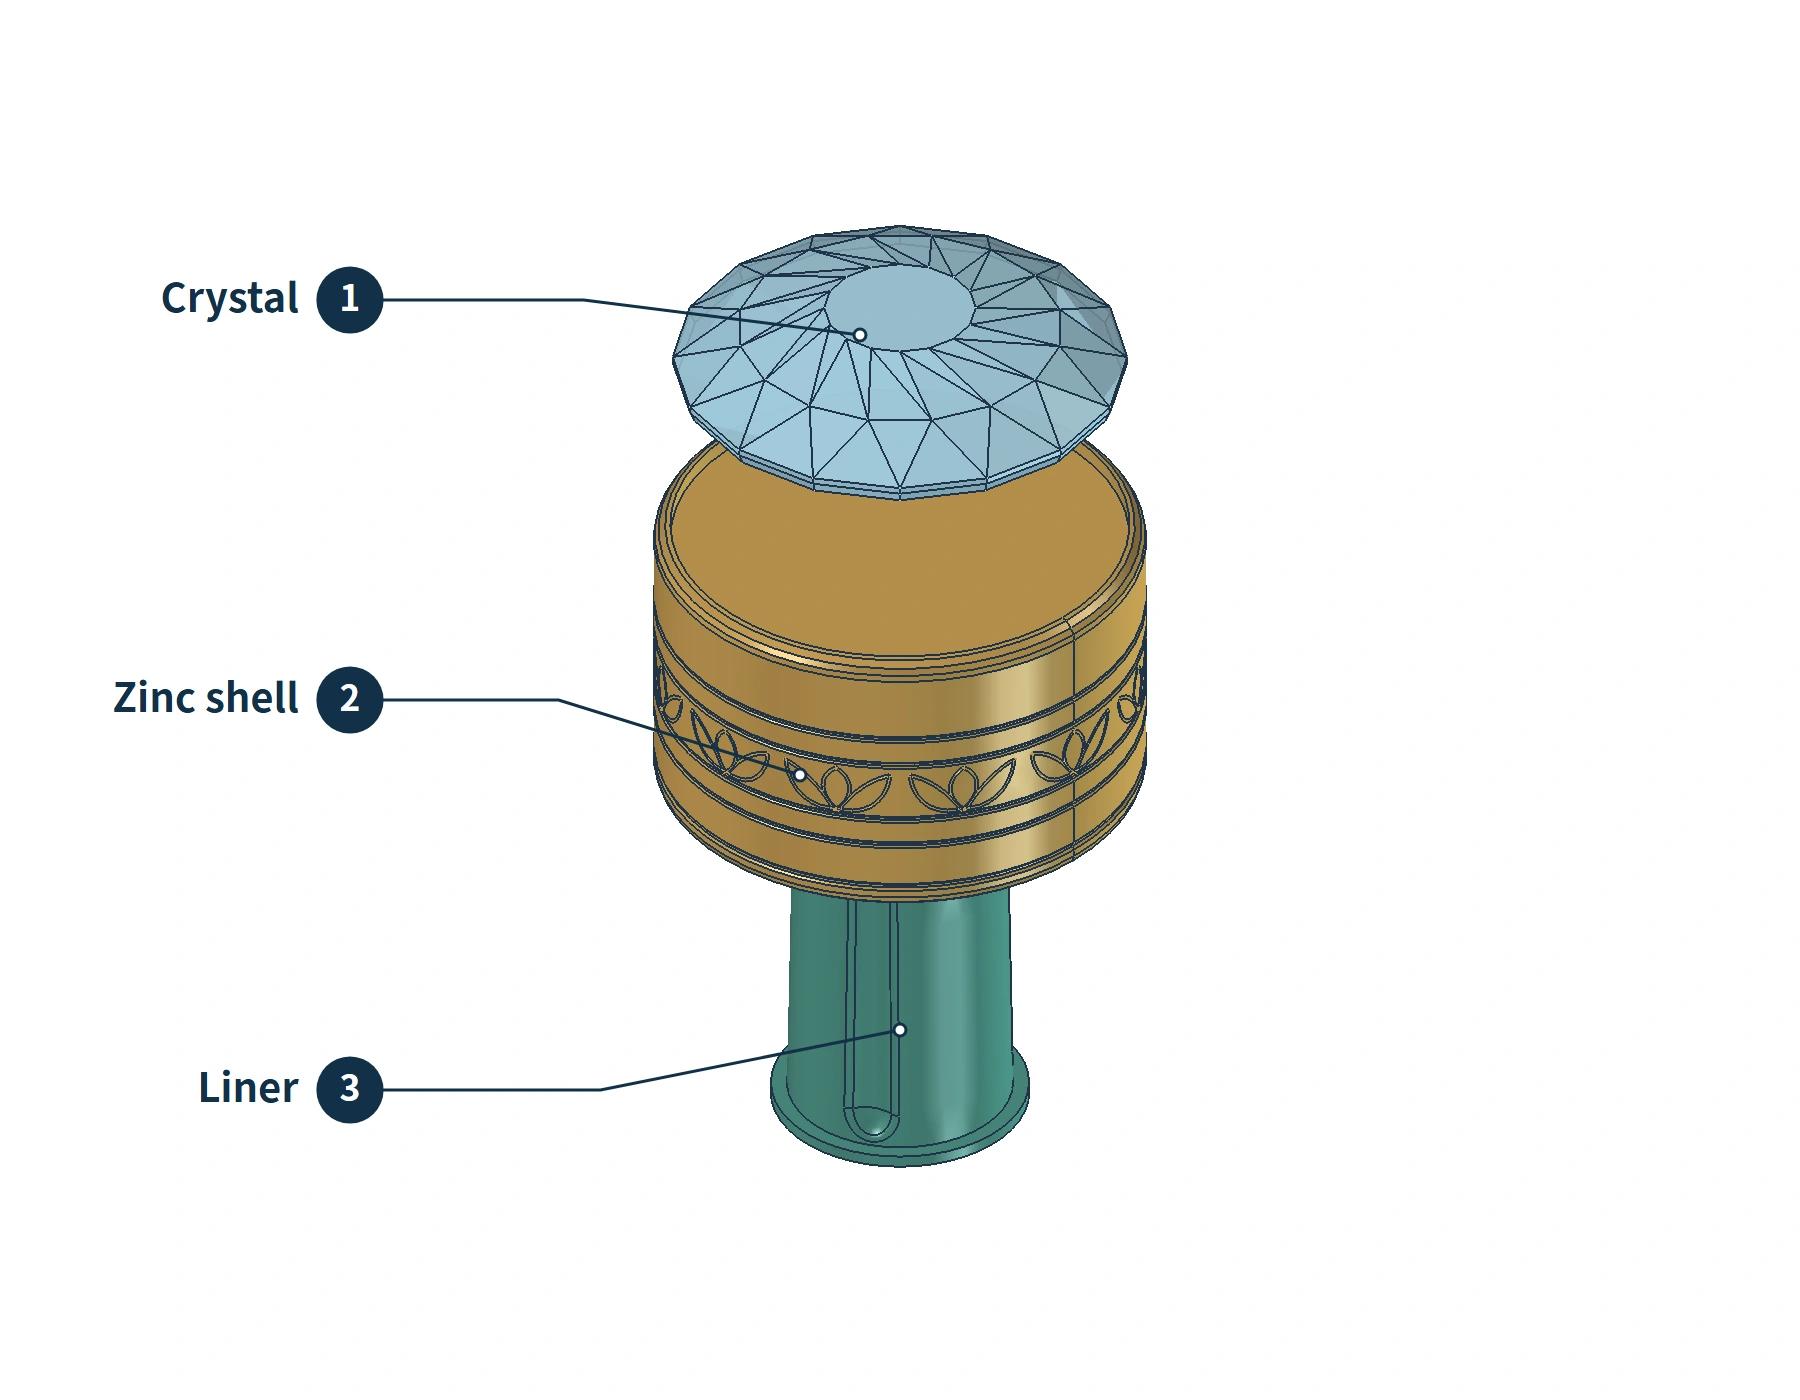
A zinc alloy crystal perfume cap combines a zinc alloy metal component with a transparent decorative component that has a crystal-like appearance. The patterned cap shown here illustrates the idea: a cylindrical metal shell has circumferential grooves and a repeating pattern, with a transparent, multifaceted piece set into the top.
The metal and transparent components each have their own materials, forming methods, and surface finishing processes. They are then joined to make a cap. Understanding these processes helps you connect the colors, facets, and gloss you want with specific manufacturing and assembly approaches.
Why Is It Called a Zinc Alloy Crystal Perfume Cap?
The name combines three pieces of information: zinc alloy identifies the material of the metal component, crystal describes the appearance of the transparent decoration, and perfume cap identifies the product’s use.
Here, “crystal” suggests clarity, defined edges, and changes in light and shade. It does not mean that the transparent component must be natural crystal. Both glass and transparent resins can produce this appearance.
The assembly also contains more than the two components mentioned in its name. This design consists of a transparent top, a zinc alloy outer shell, and a plastic liner. The visible exterior pairs metal with a transparent component, while the inside accommodates a separate liner.
What Materials Can Create the Crystal Effect, and How Are They Formed?
Transparent decorative components can follow several material routes. The table below focuses on glass, acrylic, and ionomers, and how they acquire their facets and smooth surfaces.
| Transparent component material | What it is | How its shape and surface are formed |
|---|---|---|
| Glass, including specific crystal glass formulations | A glass material; the term crystal glass is not equivalent to natural mineral crystal | Glass can be pressed in a mold to form its outline and then annealed to reduce internal stress. Grinding and polishing can also shape and finish it. |
| Acrylic, or polymethyl methacrylate (PMMA) | A transparent plastic, also called acrylic glass | Injection-molding grades can be formed in a mold, with the cavity defining the outer shape and facets. |
| Ionomer resin, such as SURLYN | A transparent resin used in packaging such as perfume caps | Injection molding produces transparent parts; molding around inserts is another available approach. |
Glass pressing can be combined with grinding and polishing. During pressing, glass is placed in a mold and a plunger forms the required outline. Subsequent grinding removes material and shapes surfaces; polishing then makes the ground areas smooth and clear. A glass component with regular facets may therefore have its main shape formed in a mold before further processing. Facets alone do not prove that every face was cut from a solid piece of glass.
Facets in transparent resin can also be formed directly by the mold. During injection molding, molten resin enters the cavity and takes its shape. The slopes and edges in the cavity are reproduced on the transparent part. Acrylic and ionomers are different resins, so their grades, part thicknesses, and processing conditions must be matched separately.
Dow’s product information for highly transparent perfume-cap resins explicitly lists injection molding as an application for SURLYN. This shows that a thick, clear cap appearance can also be achieved with resin. Transparency, facets, and surface smoothness together create the crystal effect.
This design uses a transparent faceted top to show the form. Glass, acrylic, and ionomers are options to compare during further development; the clarity shown in a rendering is not a confirmed material specification.
How Does the Zinc Alloy Shell Get Its Shape and Shine?
From Wbmetal’s die-casting perspective, this combination requires the metal shell’s shape and surface to be prepared before it is paired with the transparent component. The outline, pattern, gloss, and color come from different processing stages.
Die casting establishes the shape first. Molten zinc alloy enters a metal die under pressure, solidifies, and is removed as a casting. The cylindrical outline, the support beneath the top, and patterns that allow release from the die can be formed at this stage. Which details are cast and which require later machining depends on the die and part design.
After casting, gates and burrs must be removed and the exterior surface dressed. For a glossy finish, surface irregularities and marks that affect reflections must be addressed, followed by suitable polishing. The mirror-like appearance of the finished part comes from subsequent processing; it is not the surface condition of zinc alloy straight out of the die.
Electroplating or coating then changes the metal’s color and surface condition. The International Zinc Association’s technical guidance covers polishing, electroplating, and other treatments for zinc alloy die castings. It also explains how part geometry affects plating: deposits tend to build up on projections and edges, while deep grooves and recesses are harder to cover to the same extent.
For this cap, with its circumferential grooves and repeating pattern, the glossy areas, grooves, and decoration need to be considered together. They contribute to the design while also affecting what polishing and surface treatment can achieve. Gold, silver-white, or dark metal effects require an appropriate plating or coating system; a color name is not itself a manufacturing process.
How Is the Transparent Top Attached to the Zinc Alloy Cap?
The cutaway makes the arrangement easier to see: the transparent top rests on a support at the top of the metal shell, while the plastic liner occupies the cavity below. Metal supports the transparent top; it does not rest directly on the liner.
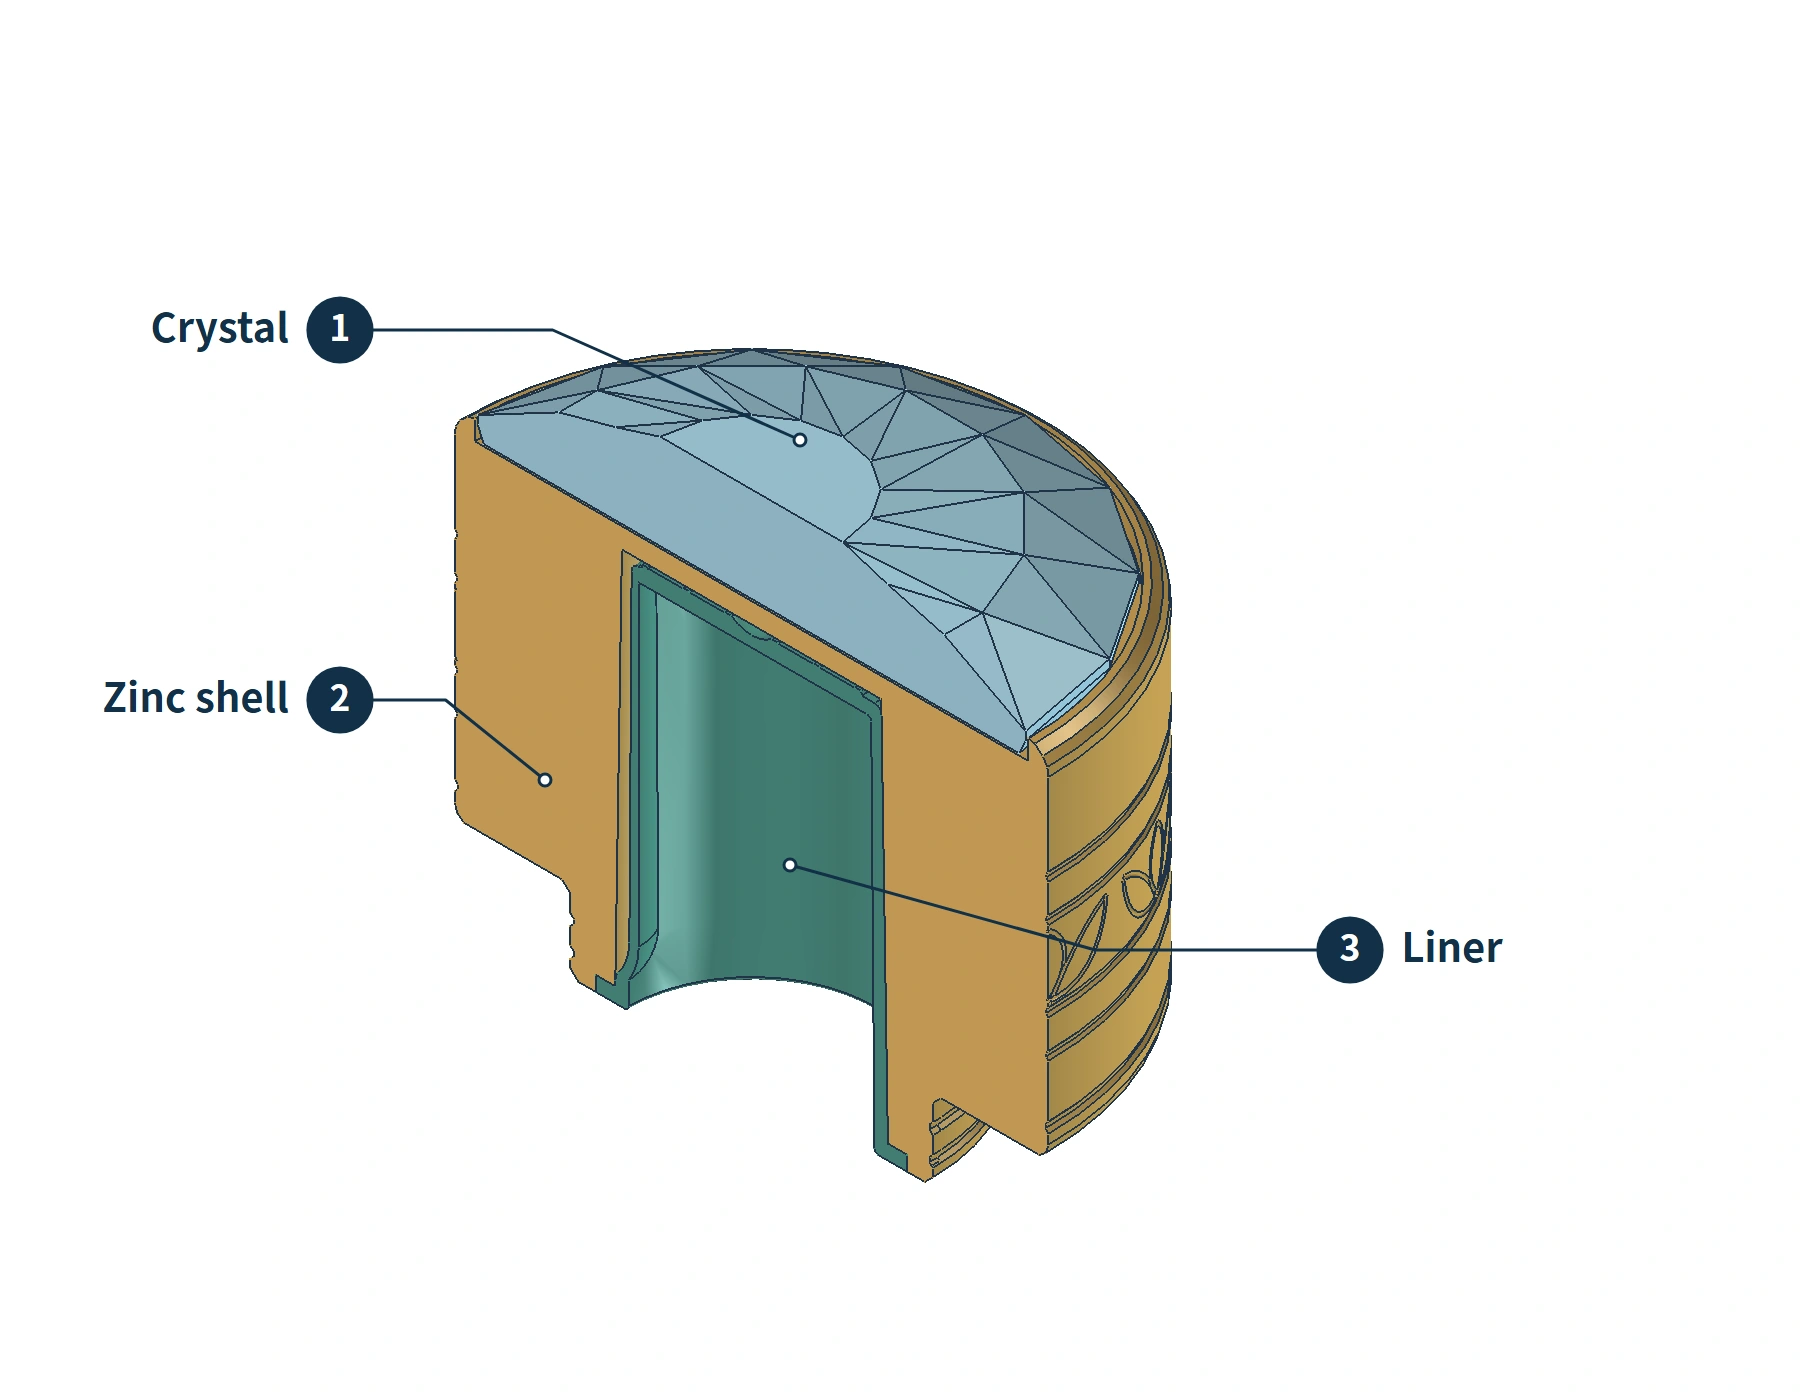
The support surface determines where the transparent component sits and how far it projects, while the surrounding outline helps locate it. Retention requires an additional connection: the top must not shift freely or detach when the cap is picked up, set down, or knocked.
Make the Components Separately, Then Bond Them
Adhesive bonding is one development approach for combining glass or transparent resin with metal. Once the metal has received its required surface treatment and the transparent component has been formed and finished, the bonding surfaces are prepared, adhesive is applied, and the top is placed in position. A fixture holds it while the adhesive cures. After curing, the adhesive layer bonds the two surfaces together. The support carries the top, while the bond helps keep it attached to the metal when the cap is lifted.
The actual bond is between the transparent component’s surface and the outermost contact surface of the metal part. If the metal has already been electroplated or coated, the adhesive bonds to that plating or coating. Choosing an adhesive therefore requires more than the description “glass to zinc alloy.”
The transparent component also makes the bond line part of the appearance. Adhesive that spills onto a visible edge, or bubbles trapped in the adhesive layer, may be visible from the front. A suitably positioned bonding area, controlled adhesive quantity, and controlled assembly pressure help preserve a clear appearance.
The transparent component should not be forced into the metal seat. Glass needs protection from concentrated local loads. For acrylic and other resins, assembly stress and compatibility with cleaners and adhesives need attention to prevent fine cracks. If a UV-curing adhesive is used, the curing light must reach the bond line; areas shadowed by metal need a suitable curing method.
This design establishes the support relationship between the top and the metal. The adhesive and retention process still need to be determined in conjunction with the final transparent material.
Mechanical Retention and Overmolding Require Suitable Structures
If a retaining ring or retention feature is intended to prevent the transparent component from coming out, those features must actually be included in the design so that they engage or hold down the component. The exploded view of this design has no separate retaining ring. The metal edge beside the top cannot simply be treated as an established locking mechanism.
Transparent resin can also be molded around an insert: the insert is placed in the mold first, and the resin is then formed around it. This approach is documented in ionomer packaging technology, but it is a different manufacturing arrangement from bonding two finished parts together. Applying it to this metal cap would require further development of the insert, mold, and molding interface.
Design Ideas Based on the Same Cap
Variations can start with specific features: the metal color, the transparent component’s color, surface gloss, and pattern. The renderings below show color combinations on the same shape, making it easier to compare how color changes the overall appearance.
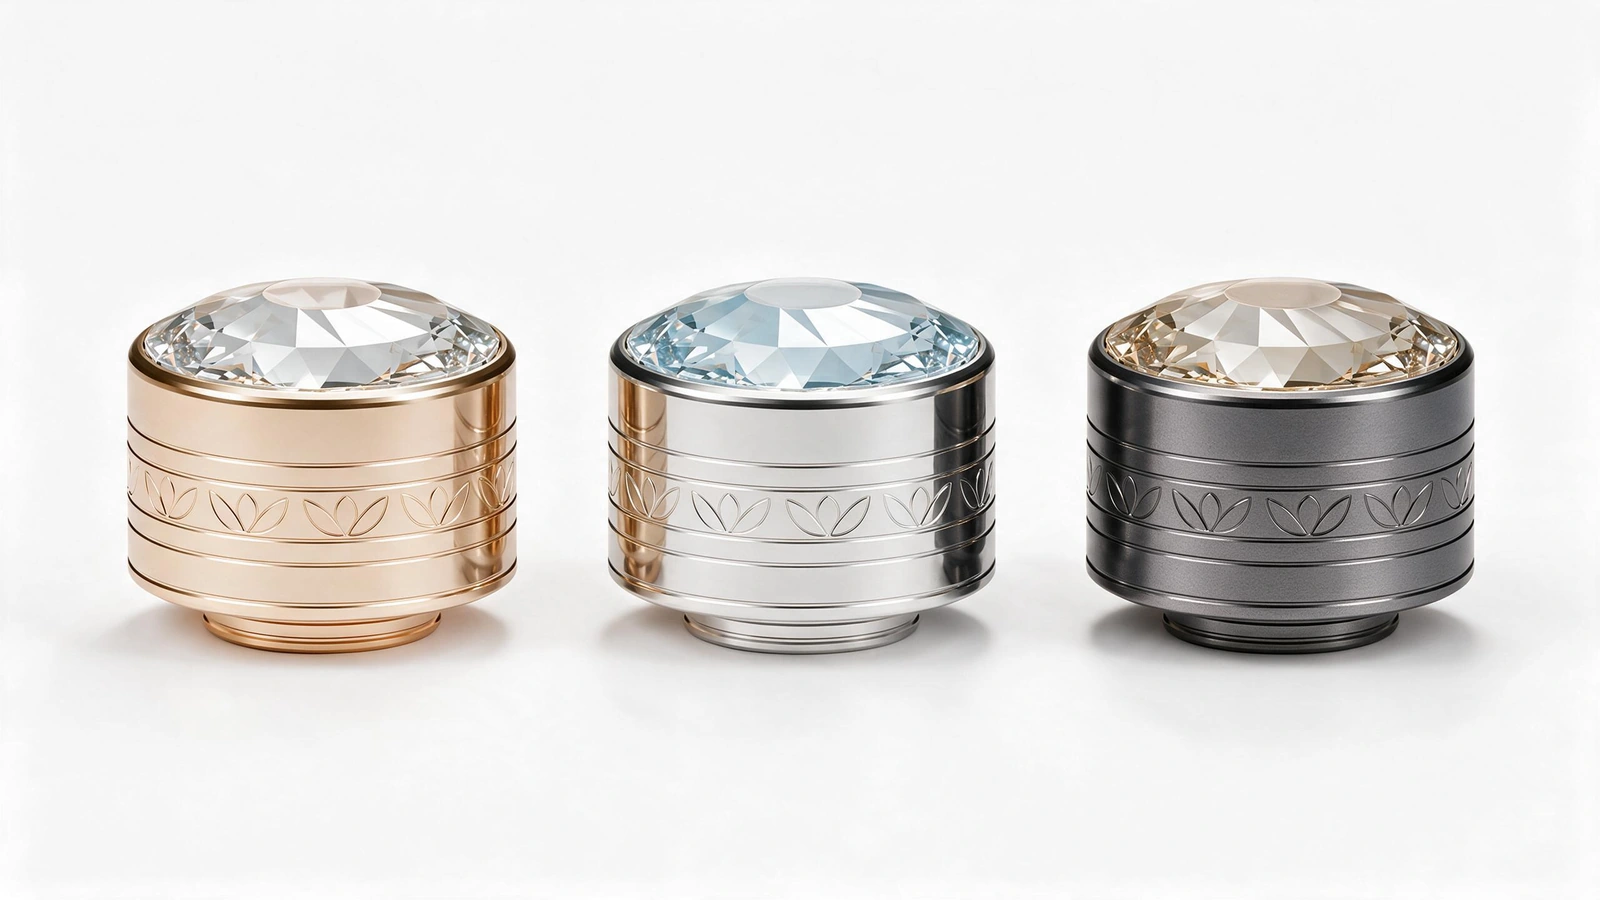
Keep the facets and change the metal and transparent-component colors. On the left, a champagne-gold shell is paired with a colorless transparent top. In the middle, a silver shell is paired with a pale-blue top. On the right, a gunmetal shell is paired with a smoky amber top. Warm, cool, and dark combinations give the same pattern and outline different moods. Color in the transparent component can come from suitable bulk coloring or surface decoration, with the method depending on whether the material is glass or resin.
Keep the pattern and change its relationship with the smooth areas. This cap already has a repeating pattern and circumferential grooves. Broad areas could retain a glossy finish while the patterned area has a softer sheen. Decoration would then come from differences in reflection across the same cap, without continually adding new graphics. Whether selective glossy and matte finishes are achievable depends on the pattern depth and subsequent processing.
Keep the transparent body and alter only part of its surface. A glass top, for example, could be explored with selectively frosted and polished areas: frosted regions create a hazy background, while smooth regions retain distinct reflections. Arranging them between the center of the top and the surrounding facets offers a way to emphasize a graphic or outline. For a resin version, the design would need to be adapted to that resin’s forming and surface-decoration methods.
Place decoration inside the transparent layer. For resins suitable for overmolding, text or graphics can be applied to an insert before it is covered with a transparent layer, placing the decoration behind the clear material. This offers a direction for exploring logos with depth, but it requires a compatible insert and mold. Adding a surface-printing step to the existing cap would not produce the same result.
When developing this type of design, first decide which feature should stand out: the transparent top’s facets, the metal’s shine, or the pattern around the shell. Making one feature the focal point and using the other two to support it makes it easier to achieve a coherent whole than applying every decoration at once.