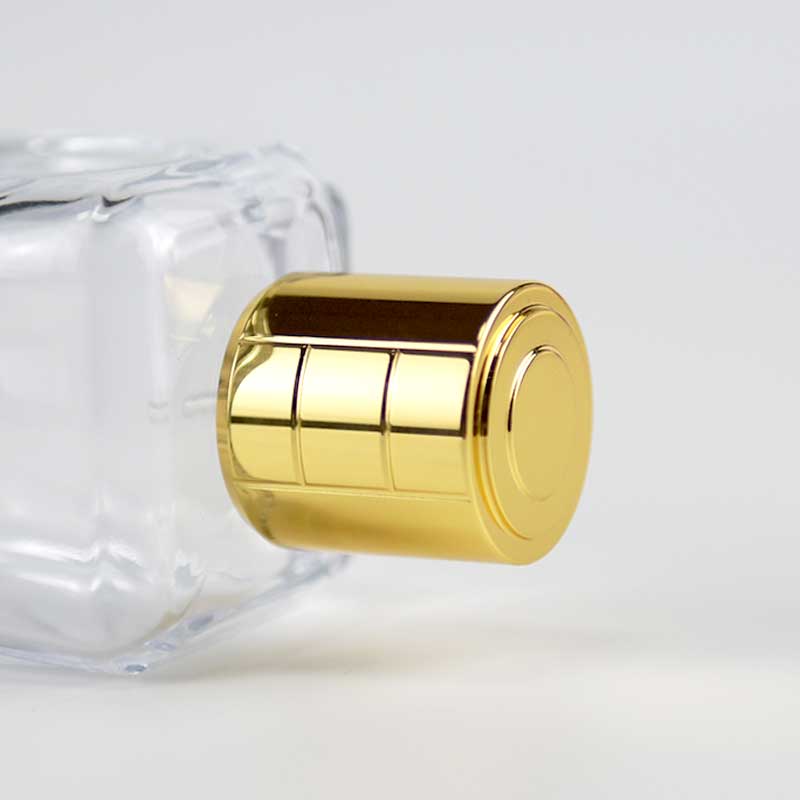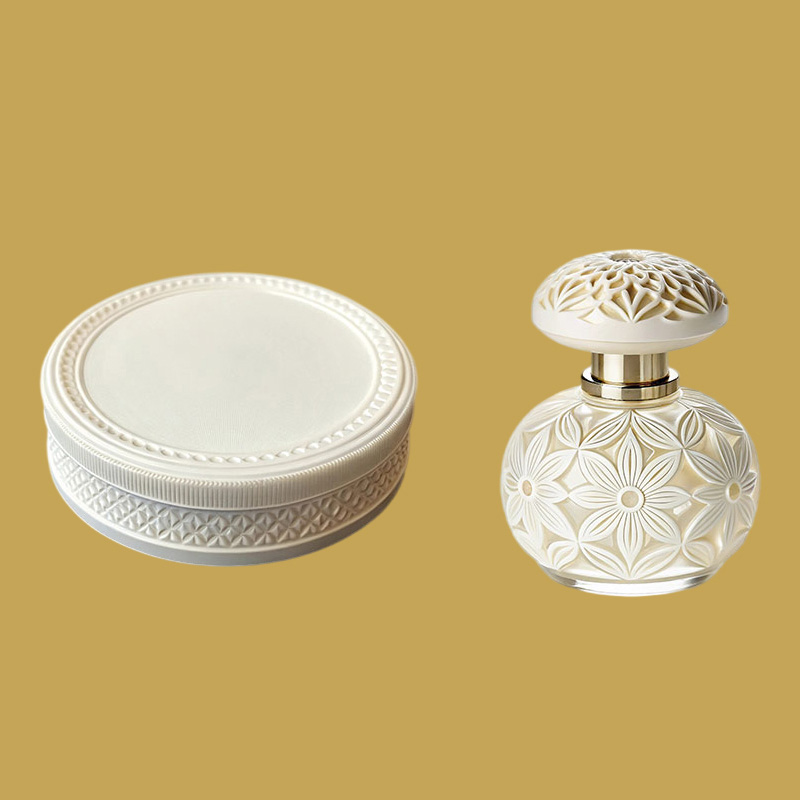
Suppose you are comparing two square perfume caps for the same bottle. Both use the same liner, and their metal shells have the same material and overall dimensions. One has a recessed top. The other has a recessed top and four sides that slope inward across the full face. With the other tooling requirements held constant, why can adding the side recesses make the die more expensive?
Wbmetal’s cap with five recessed faces shows where the extra work comes in. When evaluating the die for the metal shell, first check how the die components that form the recesses will clear the casting. The insert that forms the top recess can retract with the main die. The inserts that form the four side recesses have to move outward before the shell can be ejected. That adds machining and assembly work for the side-action mechanism.
Why the Top Insert Clears and the Side Inserts Block Ejection
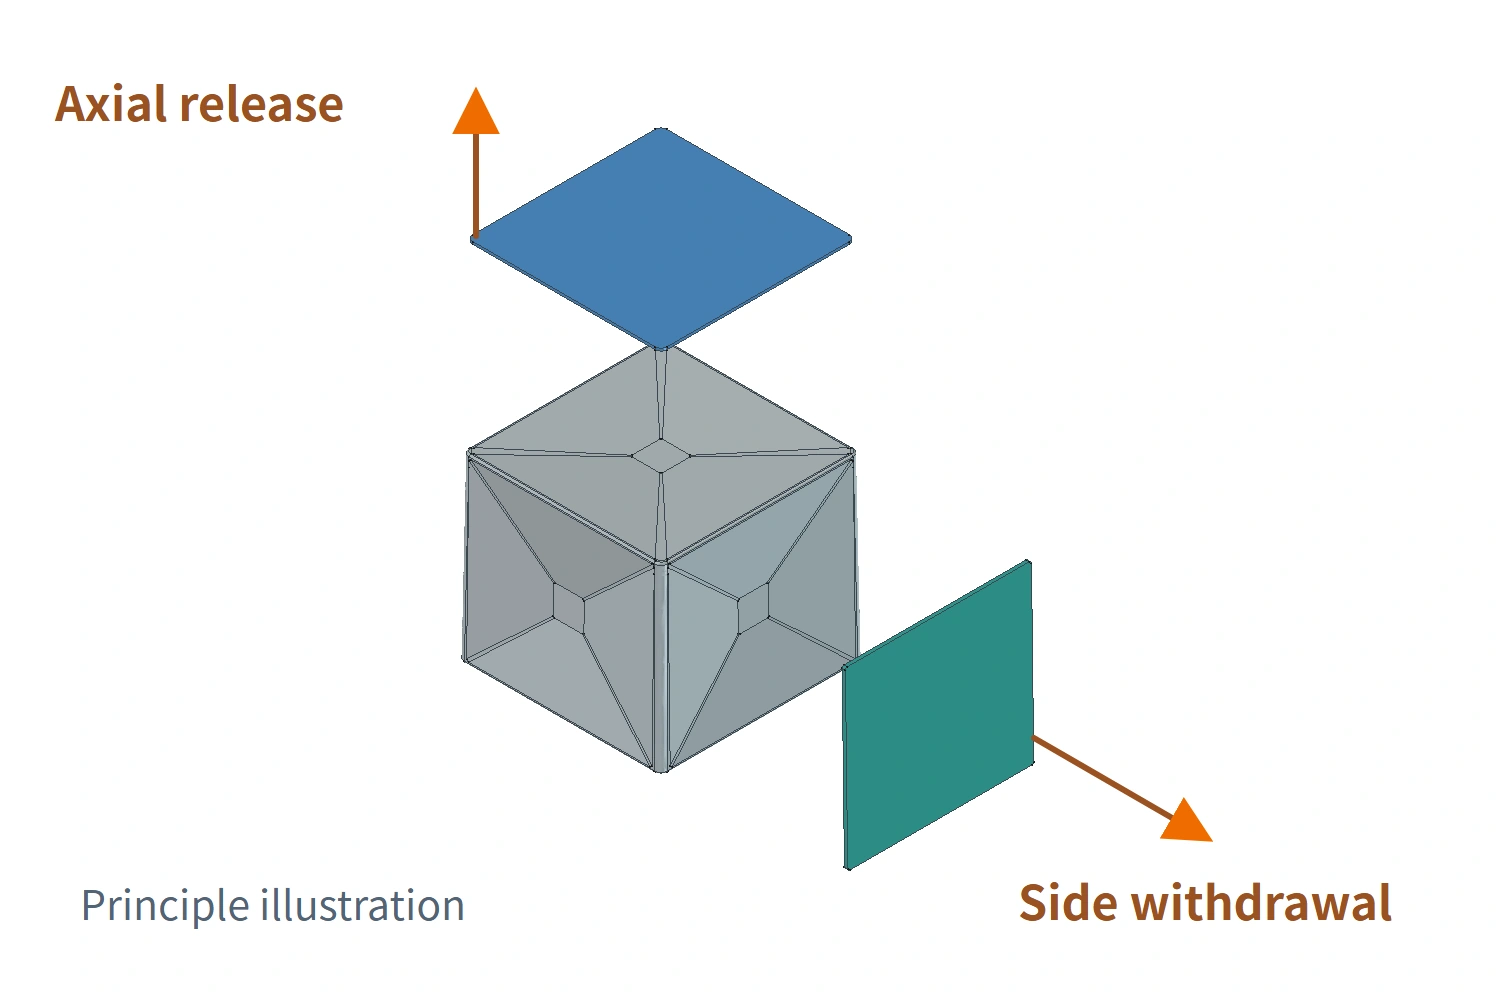
On the top and sides, each face slopes inward from its outer edges to a small, flat square at the center. The die has a matching projection. Zinc alloy solidifies around that projection, leaving a recess where it sat.
With the open end of the cap facing down, the main die opens along the axis from the opening to the top. Once the metal solidifies, the insert that forms the top recess can retract upward with the die. The side inserts extend into the recesses from the sides.
Look at the green tip of the side insert in the cross-section. If it stays in place as the shell moves up, the lower slope of the recess runs into it. A feature that blocks release along the main die opening direction is called an undercut.
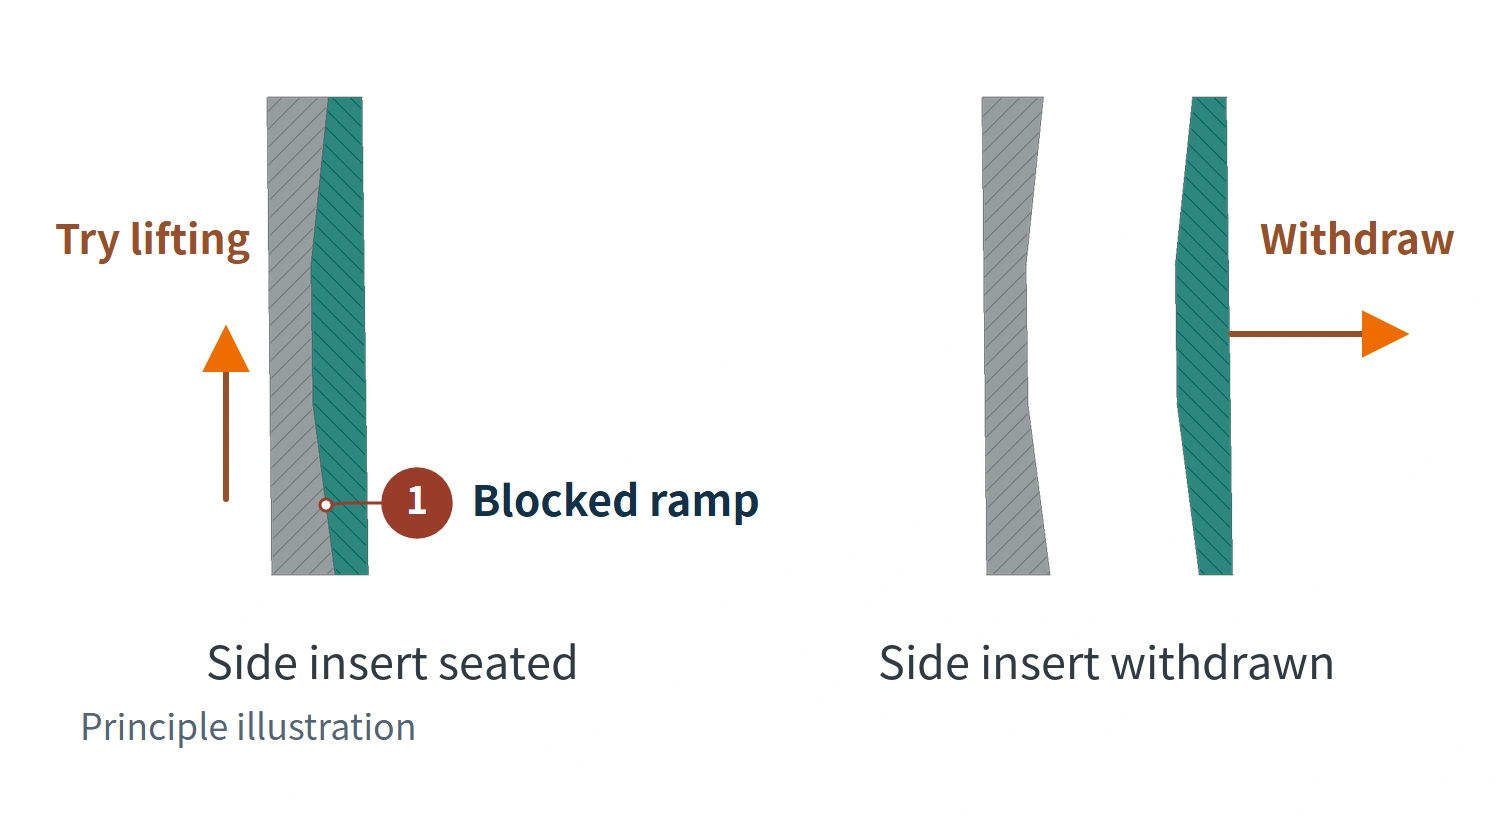
Retracting the side insert clears the shell for ejection. This side action is called a side core pull. A die slide can carry the insert.
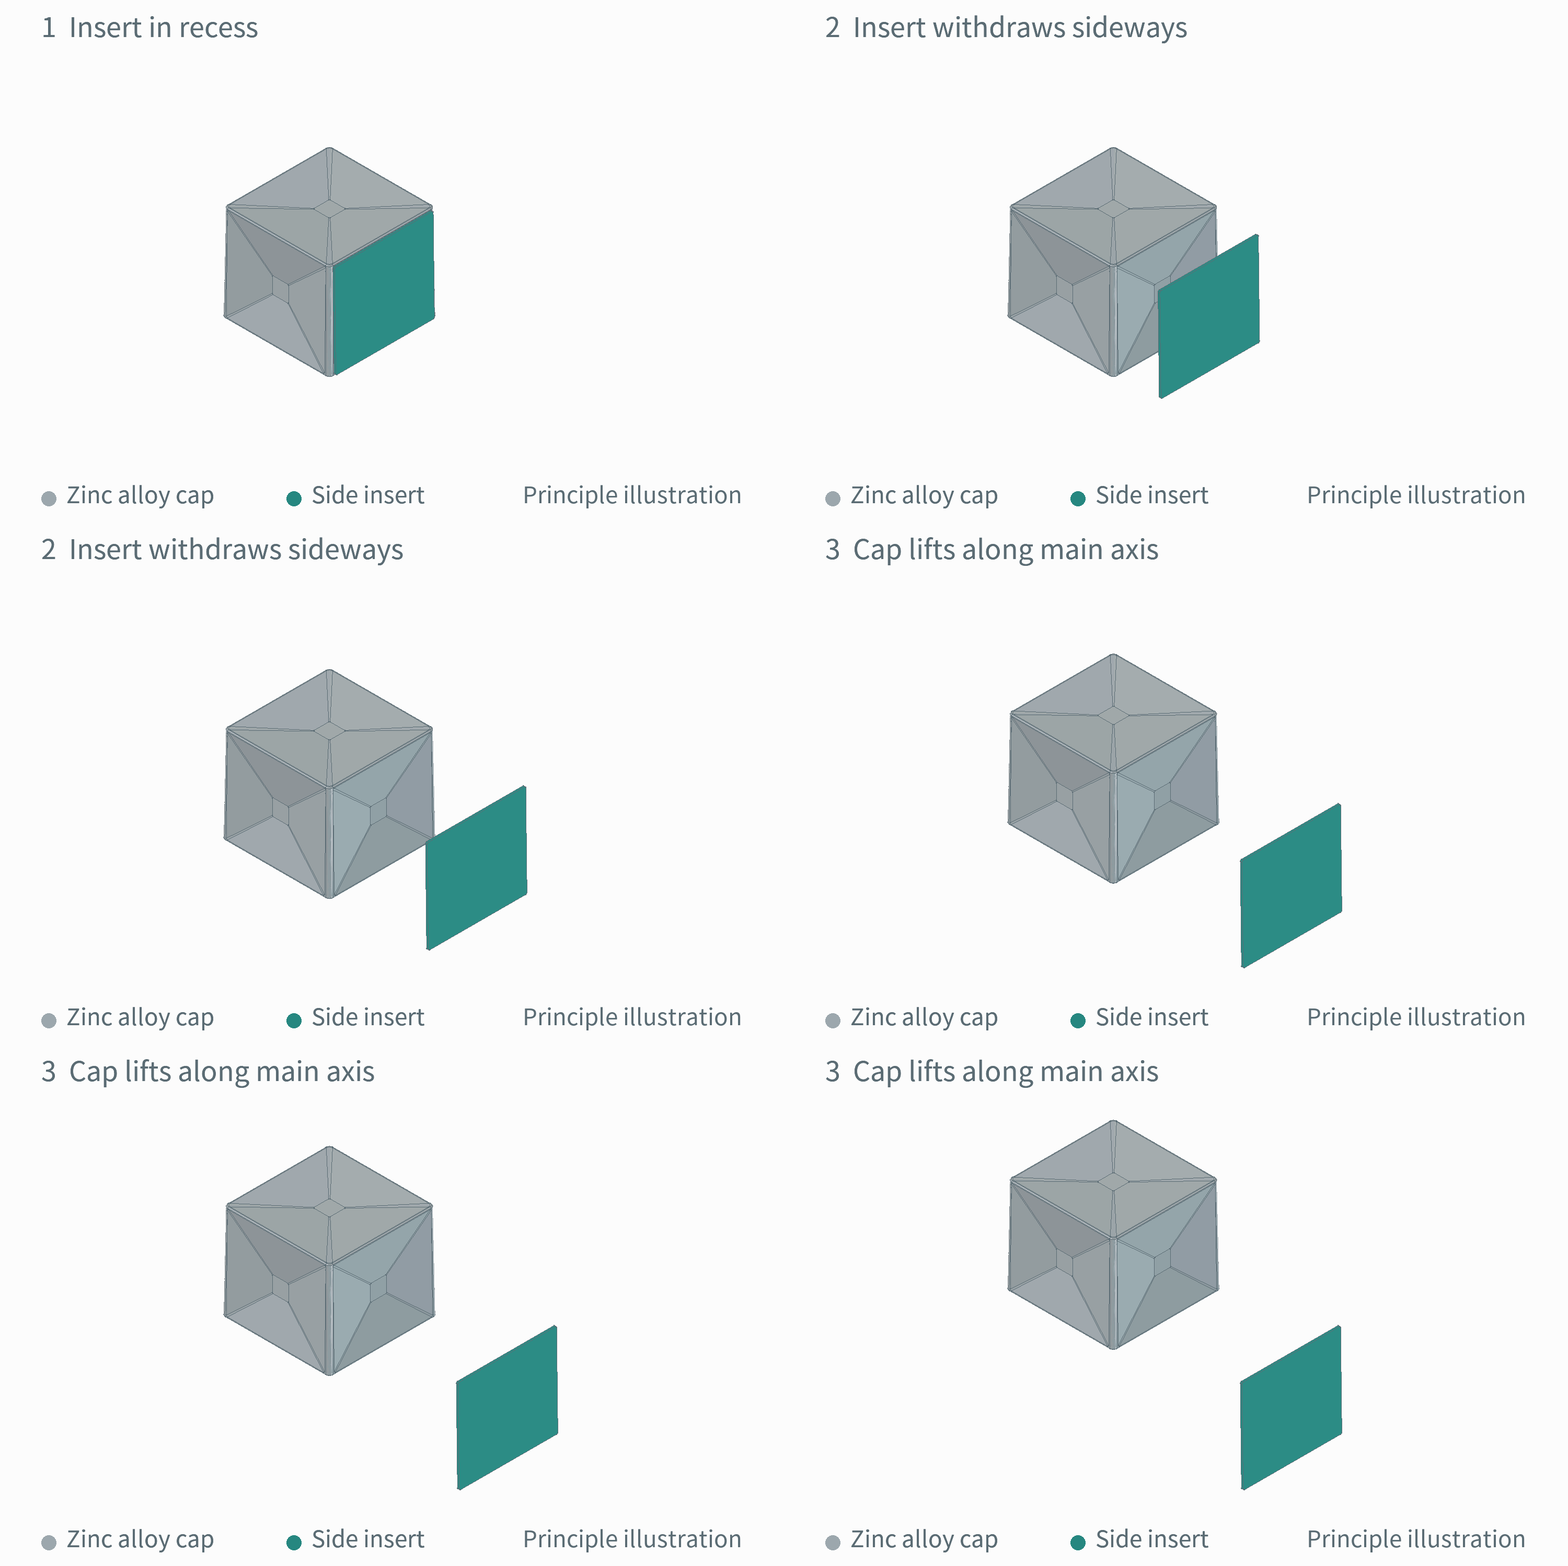
The animation illustrates one side. Each of the four sides on this cap has its own withdrawal direction. The number of slide assemblies depends on the overall die layout.
How Do Side Core Pulls Affect Tooling Costs and Unit Price?
The toolmaker has to machine inserts that match the recesses and fit guides and a drive mechanism so the inserts follow the intended path. When the die closes, the inserts must be in position and locked to withstand casting pressure. During assembly and setup, the toolmaker checks how far the inserts retract to make sure the shell has room to eject. These are extra die-making steps compared with a straight-opening die under the same requirements.
The unit price depends on the cycle time in production, how much maintenance the die needs, and whether the casting needs extra finishing, such as trimming flash where the die components meet. The side inserts can sometimes retract as the main die opens, so the cycle time may stay the same. Casting the recesses directly can also eliminate a separate machining operation on each cap.
What Can Change If You Want to Keep the Faceted Look?
If the way the top catches the light matters most, you can keep the top recess and reshape the four sides so they release along the main die opening direction. If the side facets matter too, making the recess shallower can still leave the gray lower slope shown in the cross-section in the insert’s path. One option to evaluate is reshaping that slope so the recess opens out at the rim of the cap’s open end. To consider eliminating the side action at that location, check that the entire insert has clearance along the main opening direction, from its starting position until it is fully clear. That change will also affect the lines between the facets and how the sides catch the light.
Another option is to change where the die components meet. Use the 3D model to check whether the inserts can clear along the die opening direction in the revised layout and whether the parting line would leave a visible mark on a sloped face.
If you need to keep all five recessed faces, ask the supplier to mark on the 3D model which inserts have to retract sideways and where the parting marks might show. When comparing quotes, check whether the tooling charge is listed separately or built into the unit price. Break each quote down into the tooling charge and the production price per cap, then compare the two costs separately.